Dear Readers welcome to this tutorial on sending mail using the XAMPP server. In a previous post, I discussed setting up XAMPP to send mail via localhost in PHP. If you haven’t had a chance to read that yet, I recommend checking it out first!
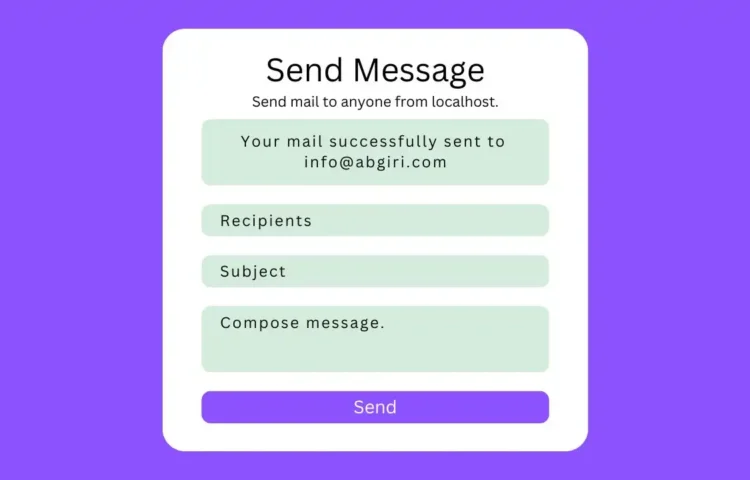
This webpage program features a form for sending mail that requires three inputs: an email address, a subject, and a message. If you try to send without filling in all three fields, you’ll see an alert: “All input fields are required!” After you fill in the details and hit send, your message will be delivered to the recipient from the email address you provided, along with a confirmation message that states: “Your mail was successfully delivered.”
If the mail fails to send, an alert message will appear: “Sorry, failed while sending mail!” If you’d like a more visual guide, check out my comprehensive video tutorial on how to send email with PHP and Gmail.
Creating the Program to Send Mail Using XAMPP Server
To set up this program for sending mail using XAMPP, you must create two files: one PHP and one CSS file. Here’s how to get started:
Create a PHP File
Name it mail.php and copy the following code into it. All PHP files should end with the .php extension for proper functioning.
<!DOCTYPE html>
<html lang="en">
   <head>
      <meta charset="UTF-8">
      <title>Send Mail From Localhost</title>
      <link rel="stylesheet" href="style.css">
      <!-- bootstrap cdn link -->
      <link rel="stylesheet" href="https://stackpath.bootstrapcdn.com/bootstrap/4.5.2/css/bootstrap.min.css">
   </head>
   <body>
      <div>
         <div>
            <div>
               <h2>
                  Send Message
               </h2>
               <p>
                  Send mail to anyone from localhost.
               </p>
               <!-- starting php code -->
               <?php
                  //first we leave this input field blank
                  $recipient = "";
                  //if user click the send button
                  if(isset($_POST['send'])){
                      //access user entered data
                     $recipient = $_POST['email'];
                     $subject = $_POST['subject'];
                     $message = $_POST['message'];
                     $sender = "From: example@gmail.com";
                     //if user leave empty field among one of them
                     if(empty($recipient) || empty($subject) || empty($message)){
                         ?>
               <!-- display an alert message if one of them field is empty -->
               <div>
                  <?php echo "All inputs are required!" ?>
               </div>
               <?php
                  }else{
                      // PHP function to send mail
                     if(mail($recipient, $subject, $message, $sender)){
                      ?>
               <!-- display a success message if once mail sent sucessfully -->
               <div>
                  <?php echo "Your mail successfully sent to $recipient"?>
               </div>
               <?php
                  $recipient = "";
                  }else{
                   ?>
               <!-- display an alert message if somehow mail can't be sent -->
               <div>
                  <?php echo "Failed while sending your mail!" ?>
               </div>
               <?php
                  }
                  }
                  }
                  ?> <!-- end of php code -->
               <form action="mail.php" method="POST">
                  <div>
                     <input name="email" type="email" placeholder="Recipients" value="<?php echo $recipient ?>">
                  </div>
                  <div>
                     <input name="subject" type="text" placeholder="Subject">
                  </div>
                  <div>
                     <!-- change this tag name into textarea to show textarea field. Due to more textarea I got an error, so I change the name of this field -->
                     <!-- <changeit cols="30" rows="5" name="message" placeholder="Compose your message.."></changeit> -->
                  </div>
                  <div>
                     <input type="submit" name="send" value="Send" placeholder="Subject">
                  </div>
               </form>
            </div>
         </div>
      </div>
   </body>
</html>
Create a CSS File
Name this file style.css and copy your CSS code into it. Ensure that it ends with the .css extension for easy access later.
/* custom css styling */
@import url('https://fonts.googleapis.com/css?family=Poppins:400,500,600,700&display=swap');
html,body{
    background: #007bff;
}
::selection{
    color: #fff;
    background: #007bff;
}
.container{
    position: absolute;
    top: 50%;
    left: 50%;
    transform: translate(-50%, -50%);
    font-family: 'Poppins', sans-serif;
}
.container .mail-form{
    background: #fff;
    padding: 25px 35px;
    border-radius: 5px;
    box-shadow: 0 4px 8px 0 rgba(0, 0, 0, 0.2),
                0 6px 20px 0 rgba(0, 0, 0, 0.19);
}
.container form .form-control{
    height: 43px;
    font-size: 15px;
}
.container .mail-form form .form-group .button{
    font-size: 17px!important;
}
.container form .textarea{
    height: 100px;
    resize: none;
}
.container .mail-form h2{
    font-size: 30px;
    font-weight: 600;
}
.container .mail-form p{
    font-size: 14px;
}
Read Also
- Glassmorphism Login Form in HTML and CSS
Explore the stylish world of glassmorphism as you create a modern login form using HTML and CSS. This guide breaks down the design process step by step. - Toggle Button using HTML, CSS, and JavaScript
Discover how to enhance user interaction by creating a sleek toggle button with HTML, CSS, and JavaScript. This tutorial covers everything from structure to styling. - Responsive Cards in HTML and CSS
Learn how to design eye-catching responsive cards that adapt seamlessly to any device. This guide offers practical tips for achieving stunning layouts. - Build a Google Gemini Chatbot Using HTML, CSS, and JS
Dive into chatbot development by creating a Google Gemini chatbot with HTML, CSS, and JavaScript. This tutorial will help you understand the basics of interactive forms.
Following these steps, you should successfully set up a way to send mail using the XAMPP server and PHP!
If you encounter any issues or the code doesn’t work as expected, you can download the complete code files from the link below. These free files come in a zip format that you can easily extract.

