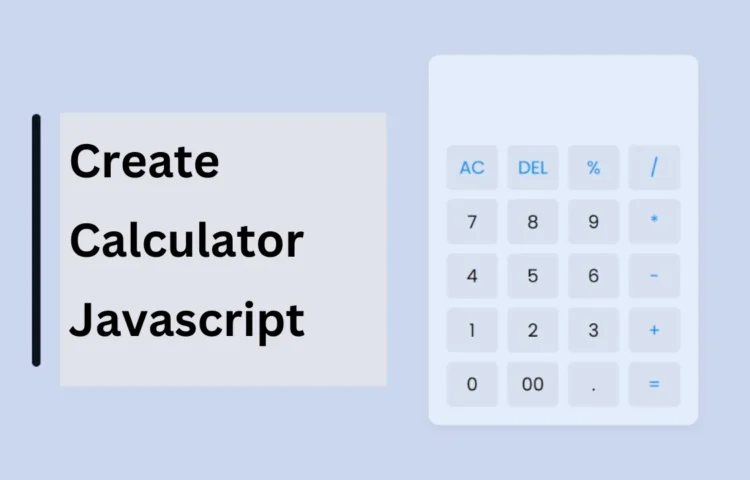
Build a Fully Functional Calculator with HTML, CSS, and JS as one of the best exercises for web developers. This project combines logic, design, and functionality, making it a fantastic way to sharpen your skills. In this blog post, we’ll guide you step-by-step through creating a responsive calculator using HTML, CSS, and JavaScript. This calculator will not only handle basic functions like addition, subtraction, multiplication, and division, but also more advanced operations, offering a hands-on experience perfect for improving your web development abilities.
Whether you’re new to web development or looking to refine your JavaScript skills, building this fully functional calculator with HTML, CSS, and JS is the perfect project to practice. It’s an ideal way to understand how HTML, CSS, and JavaScript work together in harmony to create interactive user interfaces and responsive web applications. Start learning today and enhance your development toolkit!
Steps to Build a Fully Functional Calculator with HTML, CSS, and JavaScript
To create this working calculator, follow these step-by-step instructions. Each step involves writing and structuring your HTML, styling it with CSS, and adding JavaScript to handle the operations.
- Create a Folder: Start by creating a new folder for your project. Inside this folder, you’ll create all the necessary files.
- Create index.html File: This file will contain the basic structure and layout of your calculator. It will include input fields, buttons for numbers and operations, and display areas.
- Create style.css File: The style.css file will give your calculator a clean, responsive design. Use CSS to arrange buttons and text fields, adjust fonts, and colors, and ensure the calculator looks great on desktop and mobile devices.
- Create script.js File: The script.js file will contain the JavaScript logic to make your calculator functional. This is where you’ll define the actions for each button click and handle the calculations.
Key Features of the Fully Functional Calculator
- Basic Arithmetic Operations: The calculator will be able to perform basic operations like addition, subtraction, multiplication, and division.
- Responsive Design: Thanks to CSS, your calculator will be fully responsive, ensuring it looks great on any screen size, from mobile to desktop.
- Input Validation: To ensure smooth operations, the calculator won’t allow you to click on operation buttons (e.g., plus, minus) before selecting numbers.
Detailed Code Structure
HTML Structure
Your index.html file will contain the essential structure for the calculator. It includes buttons for digits (0-9), operations (addition, subtraction, etc.), and a display area to show the input and result.
<!DOCTYPE html><html lang="en"><head><meta charset="UTF-8" /><meta http-equiv="X-UA-Compatible" content="IE=edge" /><meta name="viewport" content="width=device-width, initial-scale=1.0" /><title>Calculator in HTML CSS & JavaScript</title><link rel="stylesheet" href="style.css" /></head><body><div class="container"><input type="text" class="display" /><div class="buttons"><button class="operator" data-value="AC">AC</button><button class="operator" data-value="DEL">DEL</button><button class="operator" data-value="%">%</button><button class="operator" data-value="/">/</button><button data-value="7">7</button><button data-value="8">8</button><button data-value="9">9</button><button class="operator" data-value="*">*</button><button data-value="4">4</button><button data-value="5">5</button><button data-value="6">6</button><button class="operator" data-value="-">-</button><button data-value="1">1</button><button data-value="2">2</button><button data-value="3">3</button><button class="operator" data-value="+">+</button><button data-value="0">0</button><button data-value="00">00</button><button data-value=".">.</button><button class="operator" data-value="=">=</button></div></div><script src="script.js"></script></body></html>
CSS Styling
In your style.css, you’ll style the calculator layout, arranging the buttons in a grid format and making the design responsive. You can experiment with colors, fonts, and spacing to achieve the desired look.
/* Import Google font - Poppins */@import url("https://fonts.googleapis.com/css2?family=Poppins:wght@300;400;500;600;700&display=swap");* {margin: 0;padding: 0;box-sizing: border-box;font-family: "Poppins", sans-serif;}body {height: 100vh;display: flex;align-items: center;justify-content: center;background: #e0e3eb;}.container {position: relative;max-width: 300px;width: 100%;border-radius: 12px;padding: 10px 20px 20px;background: #fff;box-shadow: 0 5px 10px rgba(0, 0, 0, 0.05);}.display {height: 80px;width: 100%;outline: none;border: none;text-align: right;margin-bottom: 10px;font-size: 25px;color: #000e1a;pointer-events: none;}.buttons {display: grid;grid-gap: 10px;grid-template-columns: repeat(4, 1fr);}.buttons button {padding: 10px;border-radius: 6px;border: none;font-size: 20px;cursor: pointer;background-color: #eee;}.buttons button:active {transform: scale(0.99);}.operator {color: #2f9fff;}
JavaScript Functionality
Your script.js file will manage the functionality of the calculator. JavaScript will listen to user input, perform the necessary calculations, and update the display. You’ll write functions that execute when the user clicks buttons, handle input validation, and ensure the calculator operates correctly.
const display = document.querySelector(".display");const buttons = document.querySelectorAll("button");const specialChars = ["%", "*", "/", "-", "+", "="];let output = "";//Define function to calculate based on button clicked.const calculate = (btnValue) => {display.focus();if (btnValue === "=" && output !== "") {//If output has '%', replace with '/100' before evaluating.output = eval(output.replace("%", "/100"));} else if (btnValue === "AC") {output = "";} else if (btnValue === "DEL") {//If DEL button is clicked, remove the last character from the output.output = output.toString().slice(0, -1);} else {//If output is empty and button is specialChars then returnif (output === "" && specialChars.includes(btnValue)) return;output += btnValue;}display.value = output;};//Add event listener to buttons, call calculate() on click.buttons.forEach((button) => {//Button click listener calls calculate() with dataset value as argument.button.addEventListener("click", (e) => calculate(e.target.dataset.value));});
Troubleshooting and Support
If you face any difficulties while creating the calculator, don’t worry! You can always download the full source code by clicking the “Download Source Code” button below. This will give you access to all the files and allow you to test the calculator directly in your browser.
Conclusion: Build Your Fully Functional Calculator
By following these steps, you can easily create a fully functional calculator application using web technologies like HTML, CSS, and JavaScript. This project not only enhances your web development skills but also provides valuable insights into creating interactive web applications.
Read Also
- Glassmorphism Login Form in HTML and CSS
Explore the stylish world of glassmorphism as you create a modern login form using HTML and CSS. This guide breaks down the design process step by step. - Toggle Button using HTML, CSS, and JavaScript
Discover how to enhance user interaction by creating a sleek toggle button with HTML, CSS, and JavaScript. This tutorial covers everything from structure to styling. - Responsive Cards in HTML and CSS
Learn how to design eye-catching responsive cards that adapt seamlessly to any device. This guide offers practical tips for achieving stunning layouts. - Build a Google Gemini Chatbot Using HTML, CSS, and JS
Dive into chatbot development by creating a Google Gemini chatbot with HTML, CSS, and JavaScript. This tutorial will help you understand the basics of interactive forms.
Download the Source Code
To help you get started easily, you can download the complete source code for the calculator project by clicking the button below:

