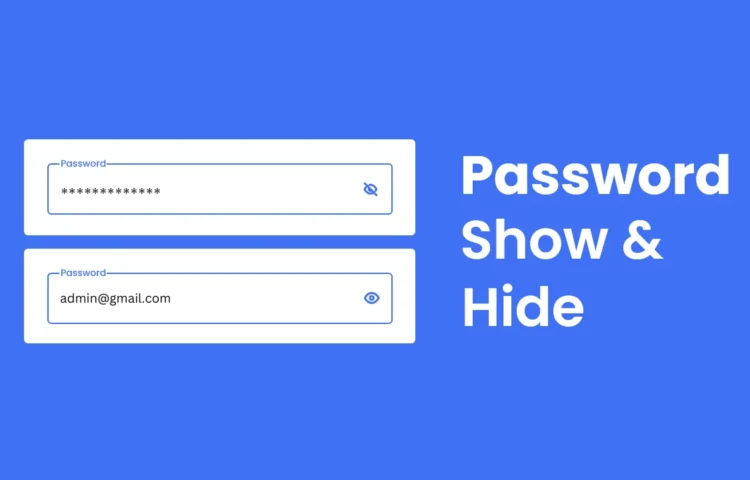
Welcome, friends! This comprehensive guide will teach you how to implement a Show & Hide Password feature using HTML, CSS, and JavaScript. This functionality is crucial for improving user experience and providing better control over password visibility in login forms.

Why You Need a Show & Hide Password Feature

The Show & Hide Password feature allows users to toggle between masked and visible passwords. It’s a simple but effective way to prevent login errors while enhancing the user experience by enabling users to double-check their passwords.

Step-by-Step Guide: Adding Show & Hide Password

Let’s jump straight into how to create the Show & Hide Password feature in your forms.

1. HTML Structure for Show & Hide Password

The first step is to create the basic HTML structure. Here’s a simple code snippet for a password input field with a toggle button:

<!DOCTYPE html>
<html lang="en">
<head>
    <meta charset="UTF-8">
    <meta http-equiv="X-UA-Compatible" content="IE=edge">
    <meta name="viewport" content="width=device-width, initial-scale=1.0">
    <!----==== CSS ====-->
    <link rel="stylesheet" href="style.css">
    <!----==== Icounscout Link ====-->
    <link rel="stylesheet" href="https://unicons.iconscout.com/release/v4.0.0/css/line.css">
     <title>Password Show & Hide</title>
</head>
<body>
    <div>
        <div>
            <input type="password" spellcheck="false" required>
            <label for="">Password</label>
            <i></i>
        </div>
    </div>
</body>
</html>

This basic structure includes a password input field and a button that will toggle the password visibility.

2. CSS Styling for the Show & Hide Password Feature

Once your HTML is set, apply CSS styling to make the form visually appealing. You can modify the styles to fit the theme of your website:

/* Google Font Import - Poppins */
@import url('https://fonts.googleapis.com/css2?family=Poppins:wght@300;400;500;600;700&display=swap');
*{
    margin: 0;
    padding: 0;
    box-sizing: border-box;
    font-family: 'Poppins', sans-serif;
}
body{
    height: 100vh;
    display: flex;
    align-items: center;
    justify-content: center;
    background: #4070f4;
}
.container{
    position: relative;
    max-width: 340px;
    width: 100%;
    padding: 20px;
    border-radius: 6px;
    background-color: #fff;
}
.container .input-box{
    position: relative;
    height: 50px;
}
.input-box input{
    position: absolute;
    height: 100%;
    width: 100%;
    outline: none;
    border: 2px solid #ccc;
    border-radius: 6px;
    padding: 0 35px 0 15px;
    transition: all 0.2s linear;
}
input:is(:focus, :valid){
    border-color: #4070f4;
}
.input-box :is(label, i){
    position: absolute;
    top: 50%;
    transform: translateY(-50%);
    color: #999;
    transition: all 0.2s linear;
}
.input-box label{
    left: 15px;
    pointer-events: none;
    font-size: 16px;
    font-weight: 400;
}
input:is(:focus, :valid) ~ label{
    color: #4070f4;
    top: 0;
    font-size: 12px;
    font-weight: 500;
    background-color: #fff;
}
.input-box i{
    right: 15px;
    cursor: pointer;
    font-size: 20px;
}
input:is(:focus, :valid) ~ i{
    color: #4070f4;
}

This styling ensures the password field and button are correctly aligned and responsive across different screen sizes.

3. JavaScript to Toggle Password Visibility

Now, let’s add the JavaScript code that will toggle between showing and hiding the password. This script listens for a button click event and toggles the password input between the “text” and “password” types.

    <script>
       const toggle = document.querySelector(".toggle"),
              input = document.querySelector("input");
              toggle.addEventListener("click", () =>{
                  if(input.type ==="password"){
                    input.type = "text";
                    toggle.classList.replace("uil-eye-slash", "uil-eye");
                  }else{
                    input.type = "password";
                  }
              })
    </script>

This JavaScript allows users to toggle the password’s visibility with a simple click, making it user-friendly and interactive.

Want to Check Username Availability on Social Media?If you’re looking to check username availability on various social media platforms, visit NameChkr to find out!
Read Also

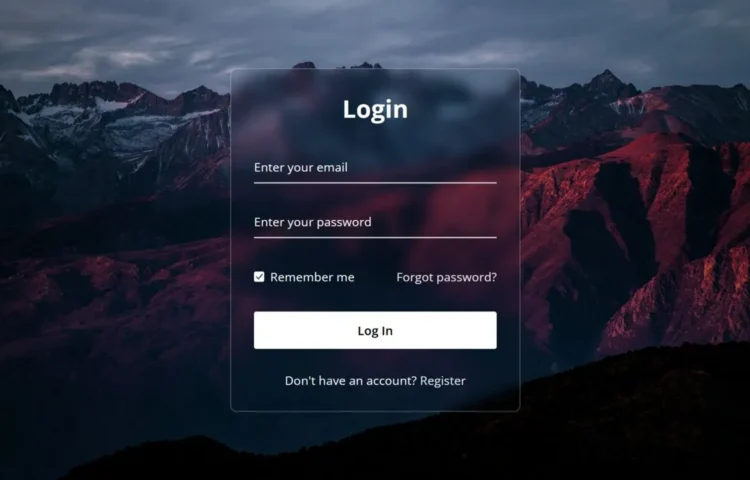
  1. Glassmorphism Login Form in HTML and CSS
    Explore the stylish world of glassmorphism as you create a modern login form using HTML and CSS. This guide breaks down the design process step by step.
  2. Toggle Button using HTML, CSS, and JavaScript
    Discover how to enhance user interaction by creating a sleek toggle button with HTML, CSS, and JavaScript. This tutorial covers everything from structure to styling.
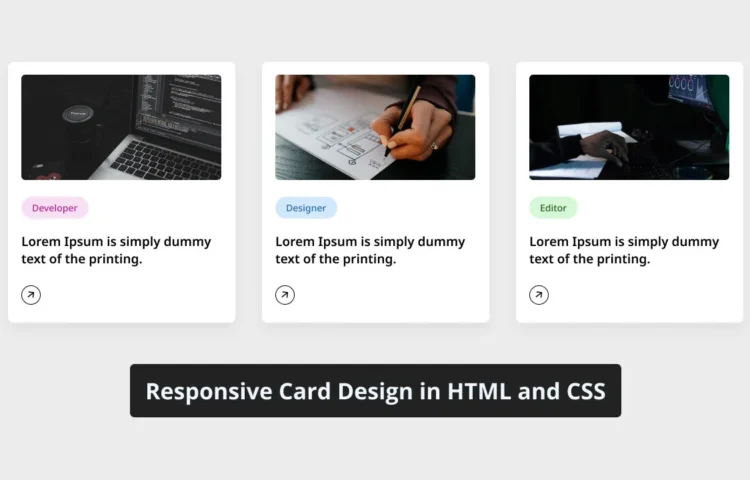
  3. Responsive Cards in HTML and CSS
    Learn how to design eye-catching responsive cards that adapt seamlessly to any device. This guide offers practical tips for achieving stunning layouts.
  4. Build a Google Gemini Chatbot Using HTML, CSS, and JS
    Dive into chatbot development by creating a Google Gemini chatbot with HTML, CSS, and JavaScript. This tutorial will help you understand the basics of interactive forms.

Final Words on Show & Hide Password Feature
Incorporating a Show & Hide Password feature is an easy way to enhance the security and usability of your login forms. You can create this proper functionality with HTML, CSS, and JavaScript in just a few steps.

If you encounter any challenges, download the source code below or view a live demo to see how it works in real time.

Necessary Plugins For WordPress Blog: Whenever We Choose a WordPress Platform For Blogging, We Have To Choose The Best Plugins For It. Many New Bloggers Do Not Know Which Plugins To Choose For Their Blog.

Through Today’s Article, We Will Tell You About the best WordPress Plugins For Blog. Every Blogger needs to Use It.

In A Previous Article, I Told You Why WordPress Is Better For Blogging. Apart From This, I Have Compared WordPress to Blogger, After Reading You Will Also Be Able To Know About The Benefits Of WordPress.

New Bloggers Do Not Understand Which WordPress Plugins Are Right For Their Website And Start Using the Wrong WP Plugins Which Are Not Of Any Use To Them.

The Best WordPress Plugins Mentioned By Us Will Not Only Help You In Ranking In Google But Will Also Take You One Step Closer To Becoming A Successful Blogger.

Now Without Any Delay Let’s Start This Article And Know Important WordPress Plugin For

Best WordPress Plugins For Blogger
A List Of Essential Plugins For A Blog Website Is Given, Which We Also Use.

1. Updraft Plus

Updraft Plus Is Used For Backup Of WordPress Website. With Its Help, You Can Make Daily Backup Of Your Website. So That If Any Of Your Content Gets Deleted By Mistake, You Will Have Its Backup Available.

2. One Signal (One Signal Information)

One Signal Plugin Is used for Push Notification. Whenever A User Visits Our Blog, One Signal Plugin Sends A Push Notification To The User.

With The Help Of Which The User Can Subscribe To Our Website The Update Of Every New Post Of Ours Reaches Him. Due To Which Our Website Also Gets Good Traffic.

3. Yoast SEO Premium

Whenever We Write An Article, It Is Very Important To Do Its SEO. Yoast SEO Is One Of The Best And Most Used SEO plugins of WordPress.

Yoast SEO Plugin Analyzes The Entire SEO Of Our Article. If There Is Any Shortcoming In SEO Then It Is Also Told. We Have Told You How To Do The Settings Of Yoast SEO Plugin In The Previous Post.

4. AMP

AMP Plugin Is Used To Increase The Loading Speed Of The Website In Mobile. Google Also Recommends AMP. AMP Plugin Reduces The Loading Speed I.E. Time Of The Website In Mobile,

5. WP Rocket (Rocket Cache Plugin)

WP Rocket Plugin Will Make Your WordPress Website Super Fast, It Is Also A Best Cache Plugin. Whenever A User Opens Your Website, It Creates A Cache In His Browser, Due To Which Your Website Will Open Very Quickly In That User’s Browser.

6. Smush (Smush Image Optimize)

Through Smush Plugin We Can Compress The Image Size Of Our Website. Smush Compresses The Large Image Size In Our Website And Converts It Into Smaller Image Size, Due To Which The Image Of Our Website Opens Quickly In Any Browser.

7. A3 Lazy Load

Images Take The Most Time To Load In Our Content. Using A3 Lazy Load Plugin, An Image Is Loaded Only When The User Scrolls. With The Help Of Which The Speed Of The Website Also Remains Good.

8. Redirection (Redirection Plugin)

Redirection Plugin Is Used To Fix Broken Links In The Website. With The Help Of Redirection, You Can Redirect Your 404 Error Page To Another Webpage.

With The Help Of Redirection, We Can Fix The Errors Of Our Website, Which Also Improves The SEO Of The Website.

9. Akismet Anti Spam (Spam Comment Plugin)

Akismet Anti Spam Plugin Is Used To Protect Your Website From Spam Commenting. This Is The Best Anti Spam Commenting Plugin Which Is Most Used On WordPress Websites.

10. Jetpack (Jet Pack Plugin)

There Are Many Features Available In the Jetpack Plugin With The Help Of Which We Can Add Many Features To Our Website Like –


  • Takes Daily Backup.
  • You Can Auto Share The Post On Social Media.
  • You Can Create A Contact Us Page.
  • Can Show Related Posts.
  • Social Share Buttons Are Available.
  • Can See The Pageview.

11. Wordfence (Security Plugin)

Wordfence Is A Security Plugin. With The Help Of Which We Can Make Our WordPress Site Secure & Safe. There Is Also A Paid Version Of Wordfence, But It’s a Free Version Also We Get Many Features that protect Our Website From Attacks By Hackers.

12. LuckyWP – Table of Content (Table of Content Plugin)

LuckyWP Plugin Is Used To Create The Table Of Content At The Beginning Of The Content. It Is Quite User Friendly And SEO Friendly. Any User Can Easily Access The Heading In Our Content That He Wants To Read.

13. Insert Header and Footer (Code Plugin in Header and Footer)

If You Do Not Have Much Knowledge Of Coding And You Do Not Want To Mess With The Coding Of Your Website Again And Again, Then Inserting Header And Footer Plugin Is Best For You. With Its Help, You Can Implement Any Code In The Header And Footer Of Your Website.

14. Ad Inserter (Ad Inserter Plugin)

If You Have Google AdSense Approval Then Ad Inserter Is The Best Plugin For Ad Placement. With Its Help, You Can Place The Best Ads As Per Your Requirement on your Website, Which Will Also Increase Your Earning.

15. Elementor Page Builder (Page Builder Plugin)

If You Want To Give A Premium Look To Your Website Then Elementor Is The Best Plugin. With Its Help, You Can Give Better Design To Your Content So That Users Will Be Attracted to your Website.

16. Broken Link Checker (Broken Link Checker Plugin)

You Can Find All The Broken Links Created on your Website Through Broken Link Checker Plugin. This Is A Very Good Plugin.

17. Google site kit

If You Want To See All The Statistics Of Google On Your WordPress Dashboard, Then Google Site Kit Plugin Is Best For You. You Can Connect It With Your Google Analytics, Search Console And Track The Traffic Coming To Your Website.

Conclusion – Essential Plugin for WordPress Website
So Friends, These Were The 18 Best WordPress Plugin For Blogger Which Are Very Important For Any WordPress Blog Website , All These Plugins Will Make Your Website Better .

We Hope You Liked This Article, Do Tell In The Comments Which Plugins You Use In Your WordPress Website .