Introduction

This tutorial will dive into a fun and creative web design effect – the Glowing Bulb Effect. If you want to add an interactive and visually stunning feature to your website, this is the perfect project. You’ll learn how to create this glowing effect using nothing but HTML and CSS, so there’s no need for JavaScript or complicated scripting.

This effect is perfect for anyone experimenting with CSS animations, transitions, and basic HTML structure to create dynamic, engaging visuals on their site. Whether you’re building a personal project, a portfolio, or adding flair to a business site, the glowing bulb effect will impress your visitors.

What is a Glowing Bulb Effect in HTML and CSS?

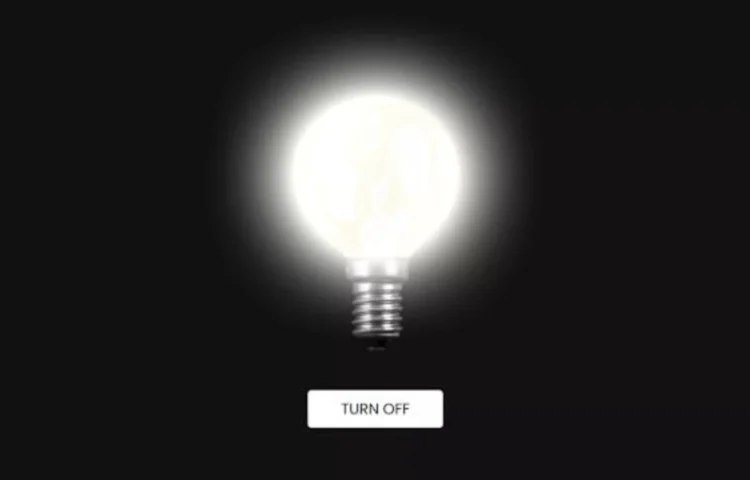
The Glowing Bulb Effect is a visual effect where a bulb image appears to glow, creating a dynamic lighting effect on your webpage. This effect simulates a light turning on and off by toggling between pictures of a glowing bulb and a standard bulb. This is achieved purely with HTML and CSS, making it a lightweight, fast-loading feature that doesn’t require JavaScript or other external libraries.

This tutorial will walk you through the steps to create this effect from scratch. You can control the bulb’s glowing state with a simple button click, providing an interactive experience for your users.

Why Should You Use the Glowing Bulb Effect?

There are many reasons why you might want to add a glowing bulb effect to your site:

  1. Visual Appeal: This effect adds a touch of elegance and creativity to your website, making it stand out from others.
  2. User Engagement: With the toggle effect, users can interact with the site, making the experience more engaging.
  3. Simple and Lightweight: Since this effect uses only HTML and CSS, it’s easy to implement, and the page will load quickly without relying on heavy scripts.
  4. Customization: You can adjust the effect to fit your site’s theme, making it as subtle or bold as you prefer.

What You’ll Need

To get started with creating the glowing bulb effect, you’ll need the following:

  • Basic knowledge of HTML and CSS: You don’t need to be an expert; you need to be comfortable working with the basics.
  • Two images: One for the bulb in its “off” state and one for the glowing “on” state.
  • A simple button to toggle between the two states.

Setting Up Your Files

First, create two files: one for your HTML and another for your CSS. Let’s go over the structure.

1. HTML Structure

The HTML will set up the basic structure for the bulb and the button that controls the glow effect. Here’s the code you’ll need for the index.html file:

<!DOCTYPE html>
<html lang="en" dir="ltr">
<head>
  <meta charset="utf-8">
  <title>Glowing Bulb Effect | Abhikesh Kumar</title>
  <link rel="stylesheet" href="style.css">
</head>
<body>
  <div class="wrapper">
    <input type="checkbox" id="btn">
    <img id="bulb-off" src="bulb-off.png">
    <img id="bulb-on" src="bulb-on.png">
    <label for="btn" class="btn">
      <span></span>
    </label>
  </div>
</body>
</html>

This HTML code sets up a container for the bulb image and a button to toggle the bulb’s state. The src for the image starts with the “off” bulb, and the button will update the bulb’s state when clicked.

2. CSS Styling

Next, we’ll create the styling to add the glowing effect to the bulb. Create a file named style.css and paste the following CSS:

@import url('https://fonts.googleapis.com/css?family=Poppins:400,500,600,700&display=swap');
*{
  margin: 0;
  padding: 0;
  box-sizing: border-box;
  font-family: 'Poppins', sans-serif;
}
body{
  display: flex;
  align-items: center;
  justify-content: center;
  min-height: 100vh;
  background: #111;
}
.wrapper{
  width: 450px;
  height: 500px;
  position: relative;
}
img{
  margin-top: -50px;
  height: 450px;
  width: 100%;
  position: absolute;
}
img#bulb-on{
  opacity: 0;
  animation: glow 3s linear infinite;
}
@keyframes glow {
  0%{
    opacity: 1;
  }
  5%{
    opacity: 1;
  }
  70%{
    opacity: 1;
  }
  74%{
    opacity: 0;
  }
  80%{
    opacity: 1;
  }
  84%{
    opacity: 0;
  }
  90%{
    opacity: 1;
  }
  100%{
    opacity: 1;
  }
}
.btn{
  position: absolute;
  bottom: 0;
  left: 50%;
  transform: translateX(-50%);
}
.btn span{
  height: 50px;
  width: 180px;
  display: block;
  text-align: center;
  line-height: 48px;
  background:none;
  color: #fff;
  text-transform: uppercase;
  font-size: 20px;
  cursor: pointer;
  border: 2px solid #fff;
  border-radius: 5px;
  transition: all 0.3s ease;
}
.btn span:hover{
  background: #fff;
  color: #111;
}
#btn:checked ~ .btn span{
  background: #fff;
  color: #111;
}
.btn span:before{
  content: "Turn Off";
}
#btn:checked ~ img#bulb-on{
  animation: none;
}
#btn:checked ~ .btn span:before{
  content: "Turn on";
}
.wrapper input{
  display: none;
}

Explanation of CSS:

  • The #bulb selector adjusts the size of the bulb image.
  • The glow animation applies a glowing effect when the bulb is “on” (indicated by bulb-on.png).
  • The @keyframes rule gradually increases the bulb’s brightness, creating a glowing effect.

Conclusion

Now that you’ve set up the HTML and CSS for your Glowing Bulb Effect, you can easily toggle the bulb’s state with a button click. This effect is lightweight, engaging, and easy to implement, making it a perfect addition to your website.

To expand this effect, you can modify the glowing brightness, add additional animations, or even change the bulb’s color for more variation.

Want to Check Username Availability on Social Media?If you’re looking to check username availability on various social media platforms, visit NameChkr to find out!
Read Also

  1. Glassmorphism Login Form in HTML and CSS
    Explore the stylish world of glassmorphism as you create a modern login form using HTML and CSS. This guide breaks down the design process step by step.
  2. Toggle Button using HTML, CSS, and JavaScript
    Discover how to enhance user interaction by creating a sleek toggle button with HTML, CSS, and JavaScript. This tutorial covers everything from structure to styling.
  3. Responsive Cards in HTML and CSS
    Learn how to design eye-catching responsive cards that adapt seamlessly to any device. This guide offers practical tips for achieving stunning layouts.
  4. Build a Google Gemini Chatbot Using HTML, CSS, and JS
    Dive into chatbot development by creating a Google Gemini chatbot with HTML, CSS, and JavaScript. This tutorial will help you understand the basics of interactive forms.

Download Source Code

To get started quickly, you can download the complete source code for this project. Click the download button below, extract the files, and you’ll be all set!

By mastering simple HTML and CSS techniques like this, you can unlock a whole new world of interactive, dynamic effects for your website.

Creating a Digital Clock with Glowing Effect Using HTML, CSS, and JavaScript is a fantastic project for web developers of all levels. This blog will guide you through building a sleek digital clock that displays real-time with glowing gradient effects, combining aesthetics and functionality. Whether you’re enhancing your portfolio or adding interactive elements to your website, this project is a must-try.

Introduction to the Digital Clock with Glowing Effect

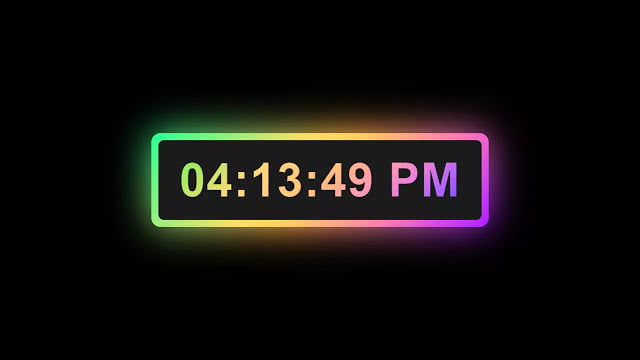
A Digital Clock shows time in numeric digits rather than using an analog clock’s rotating hands. In this tutorial, we’ll create a vibrant digital clock that fetches real-time data from your computer using JavaScript’s new Date() method and displays it with a colorful glowing background effect.

This project is perfect for beginners because it uses straightforward HTML, CSS, and JavaScript code. The glowing effect adds a visually appealing touch, making it ideal for modern web pages and personal projects.

Features of the Digital Clock with Glowing Effect

Here’s what makes this digital clock stand out:

  • Real-Time Display: The clock fetches and displays the current time dynamically.
  • Colorful Glowing Background: Adds an eye-catching gradient glow to the clock’s text and background.
  • Simple Implementation: The code is concise and beginner-friendly, perfect for those just starting with web development.
  • Customizable Design: Easily modify the gradient colors and font styles to suit your preferences or brand.
  • No Server Dependency: This clock takes real-time data directly from your device, making it fast and efficient.

Benefits of Creating a Digital Clock with Glowing Effect

  1. Enhance Your Web Development Skills: This project strengthens your fundamentals of HTML, CSS, and JavaScript.
  2. Portfolio-Worthy Design: Showcase your creative skills with an attractive and functional digital clock.
  3. Improved User Engagement: Interactive elements like clocks can enhance the user experience on your website.
  4. Customizable: Tailor the glowing effect and design to match any theme or purpose.

How to Build the Digital Clock with Glowing Effect

To build the Digital Clock with a Glowing Effect, you need an HTML file and a CSS file. Follow the steps below:

HTML File

Start by creating the structure of the clock. Here’s the code for the HTML file:

<!DOCTYPE html>
<!-- Created By abhikesh.com -->
<html lang="en" dir="ltr">
<head>
    <meta charset="utf-8">
    <title>Digital Clock with Glowing Effect | Abhikesh Kumar</title>
</head>
<body>
    <div class="wrapper">
        <div class="display">
            <div id="time"></div>
        </div>
        <span></span>
        <span></span>
    </div>
</body>
</html>

CSS File

The CSS file is where the magic happens, bringing the glowing effect to life and styling the digital clock beautifully.

Create a file named style.css and add the following code to transform your clock into a glowing masterpiece.

    <style>
        * {
            margin: 0;
            padding: 0;
            font-family: 'Poppins', sans-serif;
        }
 
        html,
        body {
            display: grid;
            height: 100%;
            place-items: center;
            background: #000;
        }
 
        .wrapper {
            height: 100px;
            width: 360px;
            position: relative;
            background: linear-gradient(135deg, #14ffe9, #ffeb3b, #ff00e0);
            border-radius: 10px;
            cursor: default;
            animation: animate 1.5s linear infinite;
        }
 
        .wrapper .display,
        .wrapper span {
            position: absolute;
            top: 50%;
            left: 50%;
            transform: translate(-50%, -50%);
        }
 
        .wrapper .display {
            z-index: 999;
            height: 85px;
            width: 345px;
            background: #1b1b1b;
            border-radius: 6px;
            text-align: center;
        }
 
        .display #time {
            line-height: 85px;
            color: #fff;
            font-size: 50px;
            font-weight: 600;
            letter-spacing: 1px;
            background: linear-gradient(135deg, #14ffe9, #ffeb3b, #ff00e0);
            -webkit-background-clip: text;
            -webkit-text-fill-color: transparent;
            animation: animate 1.5s linear infinite;
        }
 
        @keyframes animate {
            100% {
                filter: hue-rotate(360deg);
            }
        }
 
        .wrapper span {
            height: 100%;
            width: 100%;
            border-radius: 10px;
            background: inherit;
        }
 
        .wrapper span:first-child {
            filter: blur(7px);
        }
 
        .wrapper span:last-child {
            filter: blur(20px);
        }
    </style>

JavaScript File

Finally, JavaScript is used to fetch real-time data and display it on the clock. Create a file named script.js and add this code:

<script>
        setInterval(() => {
            const time = document.querySelector(".display #time");
            let date = new Date();
            let hours = date.getHours();
            let minutes = date.getMinutes();
            let seconds = date.getSeconds();
            let day_night = "AM";
            if (hours > 12) {
                day_night = "PM";
                hours = hours - 12;
            }
            if (seconds < 10) {
                seconds = "0" + seconds;
            }
            if (minutes < 10) {
                minutes = "0" + minutes;
            }
            if (hours < 10) {
                hours = "0" + hours;
            }
            time.textContent = hours + ":" + minutes + ":" + seconds + " " + day_night;
        });
    </script>
Want to Check Username Availability on Social Media?If you’re looking to check username availability on various social media platforms, visit NameChkr to find out!
Read Also

  1. Glassmorphism Login Form in HTML and CSS
    Explore the stylish world of glassmorphism as you create a modern login form using HTML and CSS. This guide breaks down the design process step by step.
  2. Toggle Button using HTML, CSS, and JavaScript
    Discover how to enhance user interaction by creating a sleek toggle button with HTML, CSS, and JavaScript. This tutorial covers everything from structure to styling.
  3. Responsive Cards in HTML and CSS
    Learn how to design eye-catching responsive cards that adapt seamlessly to any device. This guide offers practical tips for achieving stunning layouts.
  4. Build a Google Gemini Chatbot Using HTML, CSS, and JS
    Dive into chatbot development by creating a Google Gemini chatbot with HTML, CSS, and JavaScript. This tutorial will help you understand the basics of interactive forms.

Conclusion and Source Code

With just a few lines of code, you can create a Digital Clock with a Glowing Effect that enhances your web design projects. This clock is visually appealing and easy to customize and implement on any webpage.

To download the complete source code, click the button below:

Creating a Random Password Generator App in HTML and CSS is a practical project for beginners and professionals looking to enhance their web development skills. Password security is vital in today’s digital landscape, and building such an app provides users with strong, secure, and randomly generated passwords. This blog will guide you through creating a sleek, user-friendly design using only HTML and CSS without relying on JavaScript.

What is a Random Password Generator?

A Random Password Generator App is a tool that generates secure passwords by combining a mix of characters, including:

  • Uppercase and lowercase alphabets.
  • Numbers.
  • Special characters such as @, #, and !.

This functionality ensures the creation of complex passwords that are difficult to guess, enhancing online security for users.

Features of the Random Password Generator App

  1. User-Friendly Interface: Clean design with a simple layout for seamless navigation.
  2. Responsive Design: Fully functional across devices like desktops, tablets, and smartphones.
  3. Secure Password Generation: Creates passwords with alphanumeric and special characters.
  4. Copy Functionality: Easy-to-use copy button for pasting passwords elsewhere.
  5. Customizable Design: Easily tweak the app’s appearance to suit your brand or personal preference.

Benefits of Using a Random Password Generator

Using a Random Password Generator App provides several advantages:

1. Enhanced Security

Robust passwords help minimize the chances of hacking and cybersecurity threats. A random password generator ensures that passwords do not have predictable patterns.

2. Saves Time

Creating a secure password by hand can be time-consuming and difficult. This app generates passwords instantly, saving you Time and effort.

3. Convenience

With built-in features like the copy button, you can easily store or share your password without retyping it.

4. Password Complexity

The generated passwords include combinations that adhere to the best password security practices, making them highly reliable.

Steps to Create a Random Password Generator App using HTML and CSS

While this blog focuses on using HTML and CSS, a typical implementation of a random password generator also includes JavaScript for dynamic functionality. However, we will limit the scope to designing a functional and visually appealing layout.

Step 1: Designing the App Layout

The layout for the Random Password Generator App should include:

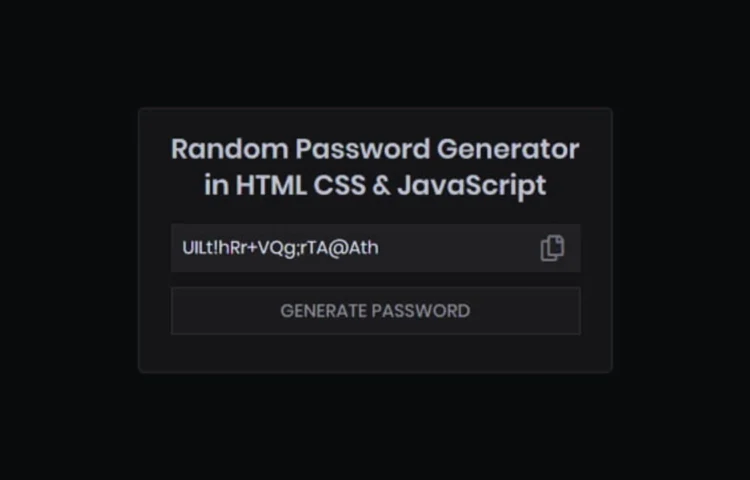
  1. Password Display Field: An input box to showcase the generated password.
  2. Copy Feature: A button that copies the generated password to your clipboard.
  3. Generate Button: A button to generate a random password.

Step 2: Adding Visual Appeal with CSS

CSS is essential for enhancing the app’s visual design and overall appeal. Key considerations include:

  1. Color Scheme: Use a neutral and professional palette, such as white backgrounds with blue and green accents.
  2. Responsive Design: Ensure the app adjusts seamlessly to different screen sizes.
  3. Hover Effects: Enhance the buttons with hover animations to improve interactivity.

Step 1: Designing the Layout with HTML

First, create the foundational structure of the app using HTML,CSS and JS. The layout should include:

  • A password display field will be created to showcase the generated password.
  • A button that allows users to quickly copy the generated password to their clipboard.
  • Another button to create the password.

Here’s an example of the HTML code:

<!DOCTYPE html>
<!-- Created By abhikesh.com -->
<html lang="en" dir="ltr">
<head>
    <meta charset="utf-8">
    <title>Random Password Generator | abhikesh kumar</title>
    <link rel="stylesheet" href="style.css">
    <link rel="stylesheet" href="https://cdnjs.cloudflare.com/ajax/libs/font-awesome/5.15.3/css/all.min.css" />
</head>
<body>
    <div class="container">
        <div class="text">
            Random Password Generator <br>in HTML CSS & JavaScript
        </div>
        <div class="input-data">
            <div class="display">
                <input type="text">
                <span class="far fa-copy" onclick="copy()"></span>
                <span class="fas fa-copy" onclick="copy()"></span>
            </div>
            <button>Generate Password</button>
        </div>
    </div>
    <script>
        const display = document.querySelector("input"),
            button = document.querySelector("button"),
            copyBtn = document.querySelector("span.far"),
            copyActive = document.querySelector("span.fas");
        let chars = "abcdefghijklmnopqrstuvwxyzABCDEFGHIJKLMNOPQRSTUVWXYZ0123456789!@#$%^&*()_+~`|}{[]:;?><,./-=";
        button.onclick = () => {
            let i,
                randomPassword = "";
            copyBtn.style.display = "block";
            copyActive.style.display = "none";
            for (i = 0; i < 16; i++) {
                randomPassword = randomPassword + chars.charAt(
                    Math.floor(Math.random() * chars.length)
                );
            }
            display.value = randomPassword;
        }
        function copy() {
            copyBtn.style.display = "none";
            copyActive.style.display = "block";
            display.select();
            document.execCommand("copy");
        }
    </script>
</body>
</html>

Step 2: Styling the App with CSS

Once the HTML is ready, enhance the app’s appearance using CSS. Your CSS should include:

  • A professional color scheme (e.g., light background with accent colors).
  • Responsiveness for all device sizes.
  • Hover effects to improve interactivity.

Here’s an example of the CSS code:

    <style>
        @import url('https://fonts.googleapis.com/css?family=Poppins:400,500,600,700&display=swap');
        * {
            margin: 0;
            padding: 0;
            box-sizing: border-box;
            font-family: 'Poppins', sans-serif;
        }
        html,
        body {
            display: grid;
            height: 100%;
            place-items: center;
            background: #000;
            text-align: center;
        }
        .container {
            width: 450px;
            background: #ff014f;
            border: 1px solid #444;
            border-radius: 5px;
            padding: 20px 25px;
        }
        .container .text {
            color: #fff;
            font-weight: 600;
            font-size: 26px;
            line-height: 35px;
        }
        .container .input-data {
            margin: 20px 5px 15px 5px;
        }
        .input-data .display {
            height: 45px;
            width: 100%;
            display: flex;
            position: relative;
        }
        .input-data .display input {
            height: 100%;
            width: 100%;
            outline: none;
            color: #eee;
            border: 1px solid #333;
            background: #222;
            padding: 10px;
            font-size: 17px;
            pointer-events: none;
            user-select: none;
        }
        .input-data .display span {
            position: absolute;
            right: 15px;
            top: 50%;
            transform: translateY(-50%);
            font-size: 25px;
            color: #fff;
            z-index: 999;
            display: none;
            cursor: pointer;
        }
        .input-data button {
            display: block;
            height: 45px;
            width: 100%;
            margin-top: 15px;
            border: 1px solid #444;
            outline: none;
            background: #1b1b1b;
            color: #fff;
            font-size: 17px;
            font-weight: 500;
            text-transform: uppercase;
            cursor: pointer;
            transition: all 0.3s ease;
        }
        .input-data button:hover {
            background: #222;
        }
    </style>

SEO Tips for Optimizing Your Password Generator App

When creating your Random Password Generator App in HTML and CSS, it’s essential to make the content SEO-friendly to attract organic traffic. Here are some tips:

  1. Focus Keyword Usage:
    • Start the blog with the focus keyword: Random Password Generator App in HTML and CSS.
    • Use it naturally throughout the content, including subheadings and image alt text.
  2. Meta Description:
  3. Write a concise, keyword-rich meta description. For example:
    Discover how to build a stylish Random Password Generator App using HTML and CSS. Improve your web development abilities through this detailed guide. Perfect for secure password generation.”

  4. Image Optimization:
    • Use descriptive filenames like random-password-generator-html-css.png.
    • Add alt tags such as: “Random Password Generator App designed with HTML and CSS for secure passwords.”
  5. Readability:
  6. Break down the content into short paragraphs and use subheadings to improve user experience.

Want to Check Username Availability on Social Media?If you’re looking to check username availability on various social media platforms, visit NameChkr to find out!
Read Also

  1. Glassmorphism Login Form in HTML and CSS
    Explore the stylish world of glassmorphism as you create a modern login form using HTML and CSS. This guide breaks down the design process step by step.
  2. Toggle Button using HTML, CSS, and JavaScript
    Discover how to enhance user interaction by creating a sleek toggle button with HTML, CSS, and JavaScript. This tutorial covers everything from structure to styling.
  3. Responsive Cards in HTML and CSS
    Learn how to design eye-catching responsive cards that adapt seamlessly to any device. This guide offers practical tips for achieving stunning layouts.
  4. Build a Google Gemini Chatbot Using HTML, CSS, and JS
    Dive into chatbot development by creating a Google Gemini chatbot with HTML, CSS, and JavaScript. This tutorial will help you understand the basics of interactive forms.

Conclusion

A Random Password Generator App in HTML and CSS is a valuable addition to any web developer’s portfolio. It showcases design skills and the ability to create practical tools. By following this guide, you’ll build an appealing app and optimize your content for search engines, driving organic traffic to your site.

For the complete source code, click the button below:

Social media sharing is a crucial aspect of modern websites. Adding a Fixed Social Media Sidebar Widget enhances user experience and increases content reach by encouraging visitors to share your content on their favourite platforms. In this guide, I’ll walk you through creating a visually engaging and responsive Fixed Social Media Sidebar Widget using HTML and CSS.

Why Use a Fixed Social Media Sidebar Widget?

A Fixed Social Media Sidebar Widget is an excellent way to keep social sharing buttons accessible to users as they scroll through your site. This consistent visibility improves engagement and encourages users to share your content without interrupting their browsing experience.

Some of the advantages include:

  1. Improved User Engagement: Users can easily share content without searching for buttons.
  2. Enhanced Visual Appeal: A well-designed widget adds a professional look to your site.
  3. Increased Traffic: Sharing buttons encourage organic traffic from social platforms.

Key Features of the Fixed Social Media Sidebar Widget

This widget includes the following features:

  • Fixed position on the screen, visible at all times.
  • Social media icons styled with smooth hover effects.
  • Design optimized for seamless viewing across all screen sizes.

How Fixed Social Media Sidebar Widget Works

This Fixed Social Media Sidebar Widget uses pure HTML and CSS for its functionality and appearance. The widget consists of:

  • HTML for the structure, including anchor links and icons.
<!DOCTYPE html>
<!-- Created By abhikesh.com -->
<html lang="en" dir="ltr">
<head>
  <meta charset="utf-8">
  <title>Floating Icons on Left Border</title>
  <link rel="stylesheet" href="style.css">
  <link rel="stylesheet" href="https://cdnjs.cloudflare.com/ajax/libs/font-awesome/5.15.3/css/all.min.css" />
</head>
<body>
  <nav>
    <ul>
      <li><a href="#"><i class="fab fa-facebook-f"></i><span>Facebook</span></a></li>
      <li><a href="#"><i class="fab fa-twitter"></i><span>Twitter</span></a></li>
      <li><a href="#"><i class="fab fa-instagram"></i><span>Instagram</span></a></li>
      <li><a href="#"><i class="fab fa-linkedin-in"></i><span>Linkedin</span></a></li>
      <li><a href="#"><i class="fab fa-github"></i><span>Github</span></a></li>
      <li><a href="#"><i class="fab fa-youtube"></i><span>Youtube</span></a></li>
    </ul>
  </nav>
</body>
</html>
  • CSS for styling, animations, and responsiveness.
  <style>
    @import url('https://fonts.googleapis.com/css?family=Montserrat:600&display=swap');
    * {
      margin: 0;
      padding: 0;
      list-style: none;
      text-decoration: none;
      box-sizing: border-box;
    }
    body {
      font-family: 'Montserrat', sans-serif;
      background: url(bg.jpeg);
      background-position: center;
      background-size: cover;
      height: 100vh;
    }
    nav {
      position: fixed;
      width: 70px;
      margin-top: 150px;
      transition: all 0.3s linear;
      box-shadow: 2px 2px 8px 0px rgba(0, 0, 0, .4);
    }
    nav li {
      height: 60px;
      position: relative;
    }
    nav li a {
      color: white;
      display: block;
      height: 100%;
      width: 100%;
      line-height: 60px;
      padding-left: 25%;
      border-bottom: 1px solid rgba(0, 0, 0, .4);
      transition: all .3s linear;
    }
    nav li:nth-child(1) a {
      background: #4267B2;
    }
    nav li:nth-child(2) a {
      background: #1DA1F2;
    }
    nav li:nth-child(3) a {
      background: #E1306C;
    }
    nav li:nth-child(4) a {
      background: #2867B2;
    }
    nav li:nth-child(5) a {
      background: #333;
    }
    nav li:nth-child(6) a {
      background: #ff0000;
    }
    nav li a i {
      position: absolute;
      top: 17px;
      left: 20px;
      font-size: 27px;
    }
    ul li a span {
      display: none;
      font-weight: bold;
      letter-spacing: 1px;
      text-transform: uppercase;
    }
    a:hover {
      z-index: 1;
      width: 200px;
      border-bottom: 1px solid rgba(0, 0, 0, .5);
      box-shadow: 0 0 1px 1px rgba(0, 0, 0, .3);
    }
    ul li:hover a span {
      padding-left: 30%;
      display: block;
    }
  </style>

No JavaScript is required, making the widget lightweight and fast.

Steps to Create the Widget

Step 1: Set Up the HTML File

Start by creating an index.html file. This file will include the structure of your widget with social media icons placed inside tags.

Step 2: Style the Widget with CSS

Create a style.css file to design the widget. Use CSS properties like position: fixed to keep the sidebar in place and hover effects to enhance user interaction.

Customizing the Design

Feel free to experiment with colours, fonts, and icon sizes to match your website’s theme. Add tooltips or modify the hover effects for a more interactive experience.

Tips for Customization:

  1. Colour Scheme: Use colours that align with your brand identity.
  2. Icons: Ensure you use high-quality, recognizable icons for social platforms.
  3. Responsiveness: Test the widget on multiple devices for compatibility.
SEO Benefits of Social Sharing Widgets

Integrating a Fixed Social Media Sidebar Widget has direct and indirect benefits for your site’s SEO:

  • Improved User Experience: Better UX can lead to lower bounce rates.
  • Increased Social Signals: Social shares contribute to traffic and may indirectly influence search engine rankings.
  • Content Visibility: Shared content gains exposure on social platforms, driving more traffic.
Want to Check Username Availability on Social Media?If you’re looking to check username availability on various social media platforms, visit NameChkr to find out!
Read Also

  1. Glassmorphism Login Form in HTML and CSS
    Explore the stylish world of glassmorphism as you create a modern login form using HTML and CSS. This guide breaks down the design process step by step.
  2. Toggle Button using HTML, CSS, and JavaScript
    Discover how to enhance user interaction by creating a sleek toggle button with HTML, CSS, and JavaScript. This tutorial covers everything from structure to styling.
  3. Responsive Cards in HTML and CSS
    Learn how to design eye-catching responsive cards that adapt seamlessly to any device. This guide offers practical tips for achieving stunning layouts.
  4. Build a Google Gemini Chatbot Using HTML, CSS, and JS
    Dive into chatbot development by creating a Google Gemini chatbot with HTML, CSS, and JavaScript. This tutorial will help you understand the basics of interactive forms.

Download the Source Code

Ready to implement this feature? Download the complete source code for the Fixed Social Media Sidebar Widget by clicking the button below.

Following this guide, you can create a professional and functional Fixed Social Media Sidebar Widget that enhances user experience and website performance. Happy coding! 🎉

Introduction

In today’s digital age, user experience is paramount, and one essential feature that enhances this experience is the Scroll To Top Button. This small yet significant functionality enables users to navigate back to the top of a webpage effortlessly, especially on content-heavy sites.

In this article, we’ll discuss how to create a Scroll Button using only HTML and CSS, making your website visually appealing and highly functional. Let’s dive into why this feature is essential and how you can implement it seamlessly.

Why Is a Scroll To Top Button Essential?

Enhances User Experience

A Scroll To the Top Button simplifies user navigation. Instead of manually scrolling back, a single click takes them straight to the top. This is especially useful for long web pages or blogs where users must revisit the header section.

Improves Accessibility

This feature is particularly beneficial for users accessing your site on mobile devices. With smaller screens and touch interfaces, navigating to the top can be cumbersome without this button.

Saves Time

A Scroll To Top Button reduces the effort required to scroll back up, ensuring a smoother browsing experience and saving valuable time for your visitors.

Benefits of a Scroll To Top Button

Lightweight and Fast

This feature is lightweight when created using only HTML and CSS, ensuring quick load times and better site performance.

Customizable Design

The button can be styled to match your website’s theme, colours, and branding, making it a cohesive part of your design.

Professional Appearance

A well-placed Scroll To Top Button enhances the overall aesthetics of your website, giving it a polished, professional look.

How to Use a Scroll To Top Button Effectively

Placement

The button is typically positioned at the bottom right corner of the screen. This location is intuitive and ensures it doesn’t obstruct the main content.

Visibility

The button should appear to users only after they have scrolled down the page. This ensures it’s not distracting when unnecessary.

Design Considerations

  • Use a subtle yet noticeable colour scheme.
  • Add smooth scrolling effects for a better visual experience.
  • Include an icon, such as an arrow, to make its function instantly recognizable.

Advantages of Including aScroll To Top Button for SEO

Adding a Scroll To the Top Button indirectly improves SEO by improving user engagement metrics. Here’s how:

  • Lower Bounce Rate: A well-designed button keeps users on your site longer, reducing their chances of leaving early.
  • Improved Dwell Time: Enhanced navigation encourages users to explore more sections of your site.
  • Better User Experience: Search engines favour websites that prioritize usability and accessibility.

Real-World Applications

Many popular websites, including blogs, e-commerce platforms, and news portals, utilize the Scroll To Top Button. This feature is ubiquitous on:

  • Blogs: Helps readers navigate easily after scrolling through lengthy articles.
  • E-commerce Sites: Simplifies navigation for users browsing multiple product listings.
  • Corporate Websites: Enhances accessibility on information-rich pages.
How to Implement a Scroll-Top Button

Creating a Scroll To Top Button with HTML and CSS is straightforward. The process involves:

  1. Defining the button in your HTML file.
  2. <!DOCTYPE html>
    <html lang="en" dir="ltr">
    <head>
        <meta charset="utf-8">
        <title>Scroll to Top Button | Abhikesh Kumar</title>
        <link rel="stylesheet" href="style.css">
        <link rel="stylesheet" href="https://cdnjs.cloudflare.com/ajax/libs/font-awesome/5.15.3/css/all.min.css" />
    </head>
    <body>
        <div class="arrow"> <a href="#" title="Back to Top"><span class="fas fa-angle-up"></span></a> </div>
        <nav>
            <div class="logo"> Abhikesh </div>
        </nav>
        <div class="content">
            <h2 class="header"> Scroll to Top Button </h2>
            <p> Lorem ipsum dolor sit amet, consectetur adipisicing elit. Id quibusdam assumenda, suscipit odit illo
                deserunt
                aut placeat illum soluta? Tenetur nisi nostrum animi ratione rem, ex repellendus distinctio. Necessitatibus
                nam
                magnam omnis aspernatur molestiae temporibus iste quibusdam qui dicta aperiam beatae nisi ipsam architecto,
                voluptas perferendis voluptatibus saepe ipsum earum sapiente explicabo fugit consequuntur deleniti, illo
                sequi.
                Amet numquam est quia explicabo nihil quas nemo dolor doloribus ipsa molestiae voluptatibus, aspernatur
                repellat
                in tempora temporibus voluptas itaque ratione expedita eveniet iste minus, eligendi cumque et laudantium.
                Natus,
                eos ad nemo, dolor velit veniam similique assumenda dolorem, illo vel quo nesciunt. </p>
            <p> Lorem ipsum dolor sit amet, consectetur adipisicing elit. Modi iure exercitationem illum omnis officiis quae
                magnam praesentium neque amet cum necessitatibus aliquid illo minus inventore voluptate reiciendis debitis,
                consequuntur libero ducimus cumque, quis totam quidem beatae in. Excepturi non culpa enim nesciunt iste
                molestias
                aperiam possimus, suscipit blanditiis corporis. Fugit eius, possimus. Nostrum fugit, animi voluptatibus quia
                reprehenderit perferendis culpa sint doloremque sapiente, vel explicabo veritatis quasi dolore
                necessitatibus
                rerum libero aperiam facilis a repellendus. Sed sint laboriosam odit itaque sequi corporis, consectetur
                amet,
                tenetur aspernatur, optio iure atque, asperiores quisquam eveniet laborum porro reiciendis expedita aperiam.
                Ipsum, ex eum, corporis odit perspiciatis eaque blanditiis reprehenderit quaerat fugit culpa voluptatum,
                cupiditate distinctio placeat. Temporibus enim ratione iste reiciendis, vitae et repudiandae ex obcaecati
                doloribus modi molestias facilis, recusandae adipisci nisi aperiam suscipit mollitia, aliquam! Iste sunt
                consequuntur modi quis mollitia, pariatur velit deserunt tempora magni id, tempore sint suscipit numquam!
            </p>
            <h2> About Section </h2>
            <p> Lorem ipsum dolor sit amet, consectetur adipisicing elit. Incidunt deleniti molestias natus vero sed,
                officia,
                doloremque quod reiciendis cumque labore exercitationem cupiditate suscipit iusto. Repellendus consequatur,
                iste
                deleniti consequuntur eius perspiciatis culpa temporibus cum nobis placeat inventore similique modi cumque
                dignissimos! Numquam accusamus eveniet animi vero, temporibus minus, nostrum, a pariatur ab repudiandae
                deleniti
                ratione eligendi quae ipsam fugit ullam ipsum ad ipsa tempore, adipisci sunt optio nemo earum. Repellat
                corporis
                nobis pariatur amet facilis, nisi rem voluptates obcaecati nesciunt dolore non et alias magni recusandae
                praesentium explicabo. Blanditiis amet nesciunt tenetur aliquid est aperiam pariatur itaque incidunt dolorum
                deserunt? </p>
            <ul>
                <li>List item 1</li>
                <li>List item 2</li>
                <li>List item 3</li>
            </ul>
            <h2> Services Section </h2>
            <p> Lorem ipsum dolor sit amet, consectetur adipisicing elit. Incidunt deleniti molestias natus vero sed,
                officia,
                doloremque quod reiciendis cumque labore exercitationem cupiditate suscipit iusto. Repellendus consequatur,
                iste
                deleniti consequuntur eius perspiciatis culpa temporibus cum nobis placeat inventore similique modi cumque
                dignissimos! Numquam accusamus eveniet animi vero, temporibus minus, nostrum, a pariatur ab repudiandae
                deleniti
                ratione eligendi quae ipsam fugit ullam ipsum ad ipsa tempore, adipisci sunt optio nemo earum. Repellat
                corporis
                nobis pariatur amet facilis, nisi rem voluptates obcaecati nesciunt dolore non et alias magni recusandae
                praesentium explicabo. Blanditiis amet nesciunt tenetur aliquid est aperiam pariatur itaque incidunt dolorum
                deserunt? </p>
            <ul>
                <li>List item 1</li>
                <li>List item 2</li>
                <li>List item 3</li>
            </ul>
            <h2> Contact Section </h2>
            <p> Lorem ipsum dolor sit amet, consectetur adipisicing elit. Incidunt deleniti molestias natus vero sed,
                officia,
                doloremque quod reiciendis cumque labore exercitationem cupiditate suscipit iusto. Repellendus consequatur,
                iste
                deleniti consequuntur eius perspiciatis culpa temporibus cum nobis placeat inventore similique modi cumque
                dignissimos! Numquam accusamus eveniet animi vero, temporibus minus, nostrum, a pariatur ab repudiandae
                deleniti
                ratione eligendi quae ipsam fugit ullam ipsum ad ipsa tempore, adipisci sunt optio nemo earum. Repellat
                corporis
                nobis pariatur amet facilis, nisi rem voluptates obcaecati nesciunt dolore non et alias magni recusandae
                praesentium explicabo. Blanditiis amet nesciunt tenetur aliquid est aperiam pariatur itaque incidunt dolorum
                deserunt? </p>
        </div>
    </body>
    </html>
  3. Styling it for visibility and responsiveness in your CSS file.
  4. <style>
        @import url('https://fonts.googleapis.com/css?family=Poppins:400,500,600,700&display=swap');
        * {
            margin: 0;
            padding: 0;
            font-family: 'Poppins', sans-serif;
        }
        html {
            scroll-behavior: smooth;
        }
        nav {
            height: 70px;
            width: 100%;
            background: #1b1b1b;
        }
        nav .logo {
            padding-left: 100px;
            line-height: 70px;
            color: #f2f2f2;
            font-size: 30px;
            font-weight: 600;
            font-family: 'Poppins', sans-serif;
        }
        .content {
            position: relative;
            top: 10px;
            padding: 0 100px;
        }
        .content h2.header {
            font-size: 40px;
        }
        .content p {
            padding: 10px 0;
            font-size: 17px;
            text-align: justify;
        }
        .content h2 {
            font-size: 35px;
        }
        .content ul {
            padding-left: 30px;
        }
        ul li {
            font-size: 20px;
        }
        .arrow {
            position: fixed;
            bottom: 30px;
            right: 30px;
            z-index: 9;
        }
        .arrow a {
            height: 39px;
            width: 37px;
            text-align: center;
            background: #1b1b1b;
            display: block;
            border-radius: 3px;
        }
        .arrow a span {
            color: #f2f2f2;
            font-size: 25px;
            line-height: 39px;
            cursor: pointer;
        }
    </style>
  5. Ensuring smooth scrolling behaviour with minimal CSS tweaks.
Best Practices for a Scroll To Top Button

Keep It Minimal

Avoid cluttering the design with excessive animations or graphics. A simple arrow icon and clean styling work best.

Test on Multiple Devices

Make sure the button works flawlessly on all gadgets, including tablets, smartphones, and PCs.

Optimize for Speed

Since this feature relies solely on HTML and CSS, ensure your code is clean and efficient for faster loading times.

Want to Check Username Availability on Social Media?If you’re looking to check username availability on various social media platforms, visit NameChkr to find out!
Read Also

  1. Glassmorphism Login Form in HTML and CSS
    Explore the stylish world of glassmorphism as you create a modern login form using HTML and CSS. This guide breaks down the design process step by step.
  2. Toggle Button using HTML, CSS, and JavaScript
    Discover how to enhance user interaction by creating a sleek toggle button with HTML, CSS, and JavaScript. This tutorial covers everything from structure to styling.
  3. Responsive Cards in HTML and CSS
    Learn how to design eye-catching responsive cards that adapt seamlessly to any device. This guide offers practical tips for achieving stunning layouts.
  4. Build a Google Gemini Chatbot Using HTML, CSS, and JS
    Dive into chatbot development by creating a Google Gemini chatbot with HTML, CSS, and JavaScript. This tutorial will help you understand the basics of interactive forms.

Conclusion

A Scroll To Top Button is more than just a navigational aid; it’s a powerful feature that enhances usability, improves accessibility, and contributes to better SEO performance. Implementing this feature using HTML and CSS allows you to create a seamless and engaging experience for your website visitors.

Whether you run a blog, an online store, or a corporate website, adding a Scroll Top Button is a small step toward creating a user-friendly and professional platform.

Download Source Code

If you have any questions or encounter issues while implementing this feature, feel free to contact us via the comments or the contact page.

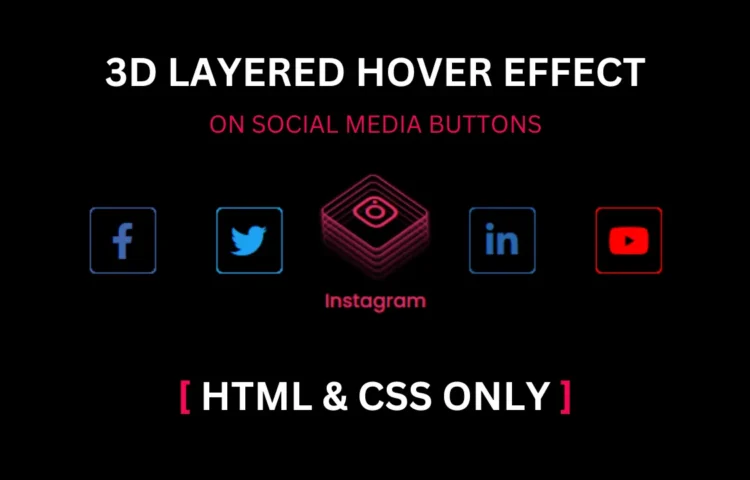
Social Media Buttons are crucial in modern web design, enabling seamless sharing and interaction across various platforms. In this guide, we’ll create Social Media Buttons with a 3D hover effect using HTML and CSS only. Adding 3D hover effects to these buttons enhances their visual appeal and boosts user engagement, leading to higher interaction rates and content sharing.

What Are Social Media Buttons?

Social Media Buttons are interactive elements on a website that provide visitors a quick way to share content. When designed effectively, these buttons encourage users to promote content, increasing reach and visibility on various social platforms. They’re a staple in modern web design, especially for content-driven sites and blogs, as they allow effortless content sharing.

Why Use 3D Hover Effects on Social Media Buttons?

The primary purpose of a 3D hover effect is to enhance the user experience by adding visual depth to the Social Media Buttons. Hover effects help capture the user’s attention and make buttons feel more interactive. This simple yet impactful design element is created using only HTML and CSS, keeping the code lightweight and easy to load.

Step-by-Step Guide to Creating Social Media Buttons with 3D Hover Effect

This guide will cover the HTML and CSS needed to create Social Media Buttons with a visually appealing 3D effect.

HTML Structure for Social Media Buttons

First, we’ll set up a simple HTML structure. This HTML file will hold the code for three social media buttons: Facebook, Twitter, and Instagram. Here’s the HTML code you’ll need:

<!DOCTYPE html>
<!-- Created By abhikesh.com -->
<html lang="en" dir="ltr">
<head>
    <meta charset="utf-8">
    <title>3D Layered Hover Effect | Abhikesh</title>
    <link rel="stylesheet" href="style.css">
    <link rel="stylesheet" href="https://cdnjs.cloudflare.com/ajax/libs/font-awesome/5.15.3/css/all.min.css" />
</head>
<body>
    <div class="icons">
        <a href="#">
            <div class="layer">
                <span></span>
                <span></span>
                <span></span>
                <span></span>
                <span class="fab fa-facebook-f"></span>
            </div>
            <div class="text">
                Facebook
            </div>
        </a>
        <a href="#">
            <div class="layer">
                <span></span>
                <span></span>
                <span></span>
                <span></span>
                <span class="fab fa-twitter"></span>
            </div>
            <div class="text">
                Twitter
            </div>
        </a>
        <a href="#">
            <div class="layer">
                <span></span>
                <span></span>
                <span></span>
                <span></span>
                <span class="fab fa-instagram"></span>
            </div>
            <div class="text">
                Instagram
            </div>
        </a>
        <a href="#">
            <div class="layer">
                <span></span>
                <span></span>
                <span></span>
                <span></span>
                <span class="fab fa-linkedin-in"></span>
            </div>
            <div class="text">
                Linkedin
            </div>
        </a>
        <a href="#">
            <div class="layer">
                <span></span>
                <span></span>
                <span></span>
                <span></span>
                <span class="fab fa-youtube"></span>
            </div>
            <div class="text">
                YouTube
            </div>
        </a>
    </div>
</body>
</html>

In this HTML, each button link has a unique class (e.g., Facebook, Twitter, Instagram) that we’ll style later in the CSS.

CSS Styling and 3D Effect Animation

Next, we’ll work on the CSS to style these Social Media Buttons. Start by adding styles to give each button a unique colour, background, and hover effect.

@import url('https://fonts.googleapis.com/css?family=Poppins:400,500,600,700&display=swap');
* {
    margin: 0;
    padding: 0;
    box-sizing: border-box;
    font-family: 'Poppins', sans-serif;
}
html,
body {
    display: grid;
    height: 100%;
    place-items: center;
    background: #000;
}
.icons {
    display: inline-flex;
}
.icons a {
    margin: 0 25px;
    text-decoration: none;
    color: #fff;
    display: block;
    position: relative;
}
.icons a .layer {
    width: 55px;
    height: 55px;
    transition: transform 0.3s;
}
.icons a:hover .layer {
    transform: rotate(-35deg) skew(20deg);
}
.icons a .layer span {
    position: absolute;
    top: 0;
    left: 0;
    height: 100%;
    width: 100%;
    border: 1px solid #fff;
    border-radius: 5px;
    transition: all 0.3s;
}
.icons a .layer span.fab {
    font-size: 30px;
    line-height: 55px;
    text-align: center;
}
.icons a:hover .layer span:nth-child(1) {
    opacity: 0.2;
}
.icons a:hover .layer span:nth-child(2) {
    opacity: 0.4;
    transform: translate(5px, -5px);
}
.icons a:hover .layer span:nth-child(3) {
    opacity: 0.6;
    transform: translate(10px, -10px);
}
.icons a:hover .layer span:nth-child(4) {
    opacity: 0.8;
    transform: translate(15px, -15px);
}
.icons a:hover .layer span:nth-child(5) {
    opacity: 1;
    transform: translate(20px, -20px);
}
.icons a:nth-child(1) .layer span,
.icons a:nth-child(1) .text {
    color: #4267B2;
    border-color: #4267B2;
}
.icons a:nth-child(2) .layer span,
.icons a:nth-child(2) .text {
    color: #1DA1F2;
    border-color: #1DA1F2;
}
.icons a:nth-child(3) .layer span,
.icons a:nth-child(3) .text {
    color: #E1306C;
    border-color: #E1306C;
}
.icons a:nth-child(4) .layer span,
.icons a:nth-child(4) .text {
    color: #2867B2;
    border-color: #2867B2;
}
.icons a:nth-child(5) .layer span,
.icons a:nth-child(5) .text {
    color: #ff0000;
    border-color: #ff0000;
}
.icons a:hover:nth-child(1) .layer span {
    box-shadow: -1px 1px 3px #4267B2;
}
.icons a:hover:nth-child(2) .layer span {
    box-shadow: -1px 1px 3px #1DA1F2;
}
.icons a:hover:nth-child(3) .layer span {
    box-shadow: -1px 1px 3px #E1306C;
}
.icons a:hover:nth-child(4) .layer span {
    box-shadow: -1px 1px 3px #2867B2;
}
.icons a:hover:nth-child(5) .layer span {
    box-shadow: -1px 1px 3px #ff0000;
}
.icons a .text {
    position: absolute;
    left: 50%;
    bottom: -5px;
    opacity: 0;
    font-weight: 500;
    transform: translateX(-50%);
    transition: bottom 0.3s ease, opacity 0.3s ease;
}
.icons a:hover .text {
    bottom: -35px;
    opacity: 1;
}

This CSS code styles the Social Media Buttons with colour and text formatting. The::before pseudo-element helps create the 3D hover layer.

Adding 3D Hover Effect Animation

To achieve the 3D layered look, let’s apply a hover effect on each button. When a user hovers over a button, it will appear to lift off the page slightly, adding a shadow for the 3D effect.

When hovering, the button’s background slightly enlarges, and a shadow appears, creating the desired 3D visual effect.

Best Practices for Social Media Buttons

  • Placement: Keep your social media buttons prominent but not intrusive. They’re often most effective in header areas or at the end of posts, where users are likely to consider sharing.
  • Consistency: Ensure that buttons match your site’s design. Use consistent colours and fonts that align with your branding.
  • Encouragement: Use clear calls to action, like “Share this post!” to encourage users to click.

FAQs on Social Media Buttons and 3D Effects

  1. How do Social Media Buttons increase engagement?
  2. These buttons simplify sharing, which can help expand your audience reach.

  3. Can these effects be added without JavaScript?
  4. This tutorial uses only HTML and CSS, making it fast and easy to implement.

  5. What is the benefit of using a 3D hover effect?
  6. The 3D effect captures attention and adds an interactive feel, making buttons more engaging.

Want to Check Username Availability on Social Media?If you’re looking to check username availability on various social media platforms, visit NameChkr to find out!
Read Also

  1. Glassmorphism Login Form in HTML and CSS
    Explore the stylish world of glassmorphism as you create a modern login form using HTML and CSS. This guide breaks down the design process step by step.
  2. Toggle Button using HTML, CSS, and JavaScript
    Discover how to enhance user interaction by creating a sleek toggle button with HTML, CSS, and JavaScript. This tutorial covers everything from structure to styling.
  3. Responsive Cards in HTML and CSS
    Learn how to design eye-catching responsive cards that adapt seamlessly to any device. This guide offers practical tips for achieving stunning layouts.
  4. Build a Google Gemini Chatbot Using HTML, CSS, and JS
    Dive into chatbot development by creating a Google Gemini chatbot with HTML, CSS, and JavaScript. This tutorial will help you understand the basics of interactive forms.

Download the Source Code

To see a live demo or download the complete source code, click the button below:

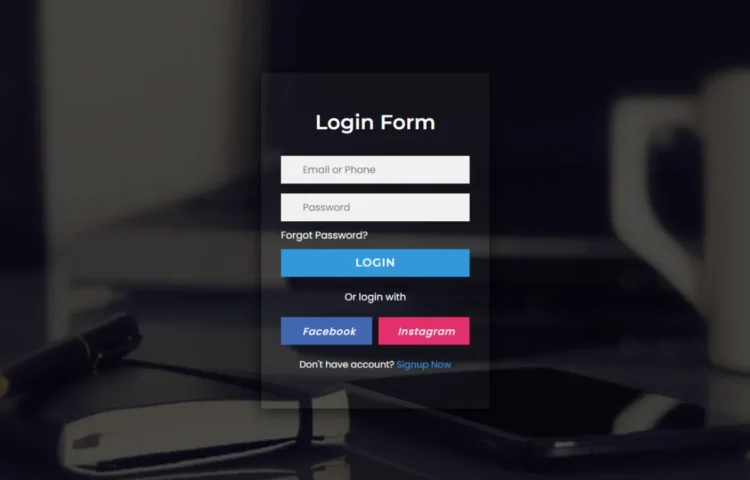
Are you looking for an elegant, modern, and transparent login form that you can quickly implement using HTML, CSS, and a little JavaScript? This step-by-step guide will walk you through creating a transparent login form design that’s lightweight, responsive, and visually stunning. It’s a great way to offer a sleek user experience while keeping your website fast and SEO-friendly.

What is a Transparent Login Form?

A transparent login form is a visually appealing input form where elements like the background or form fields have reduced opacity, giving a glass-like effect. This design is perfect for modern websites prioritizing minimalism and aesthetics, particularly for login pages, registration forms, and even portfolio or business websites. With just HTML, CSS, and minimal JavaScript for functionality, you can create a login form that stands out and adds a professional touch to your site.

Why Use Transparent Login Forms?

Transparent login forms offer more than just a great look—they also provide a user-friendly interface. This type of design is commonly used across many websites because:

  • They focus on the user input fields while blending beautifully with the background.
  • The design is lightweight, keeping your website’s performance optimized.
  • It’s highly customizable, meaning you can easily change the background, text, and form details to fit your site’s theme.

Using only HTML and CSS, you can achieve a seamless login experience without relying on heavy frameworks, ensuring your website remains responsive and SEO-optimized.

Key Features of the Transparent Login Form

This transparent login form design includes the following:

  • Transparent background that provides a sleek, glass-like appearance.
  • Username and password fields with focus animations for a clean, professional look.
  • Show/hide password toggle functionality using JavaScript for better user experience.
  • Social media icons that can link to popular platforms like Facebook, Twitter, or LinkedIn.
  • Fully responsive design that adapts to different screen sizes, ensuring mobile-friendly accessibility.

Step-by-Step Guide to Create a Transparent Login Form

Step 1: Building the HTML Structure

To start, create a basic HTML structure for the form. The form should contain input fields for the username, password, and a submit button. Here’s an example:

<!DOCTYPE html>
<html lang="en" dir="ltr">
  <head>
    <meta charset="utf-8">
    <title>Transparent Login Form UI</title>
    <link rel="stylesheet" href="style.css">
   <script src="https://kit.fontawesome.com/a076d05399.js"></script>
  </head>
  <body>
    <div class="bg-img">
      <div class="content">
        <header>Login Form</header>
        <form action="#">
          <div class="field">
            <span class="fa fa-user"></span>
            <input type="text" required placeholder="Email or Phone">
          </div>
          <div class="field space">
            <span class="fa fa-lock"></span>
            <input type="password" class="pass-key" required placeholder="Password">
            <span class="show">SHOW</span>
          </div>
          <div class="pass">
            <a href="#">Forgot Password?</a>
          </div>
          <div class="field">
            <input type="submit" value="LOGIN">
          </div>
        </form>
        <div class="login">Or login with</div>
        <div class="links">
          <div class="facebook">
            <i class="fab fa-facebook-f"><span>Facebook</span></i>
          </div>
          <div class="instagram">
            <i class="fab fa-instagram"><span>Instagram</span></i>
          </div>
        </div>
        <div class="signup">Don't have account?
          <a href="#">Signup Now</a>
        </div>
      </div>
    </div>
  </body>
</html>

Step 2: Styling with CSS

Now, it’s time to make the form look stylish using CSS. You’ll use properties like opacity for the transparent effect and border-radius for smooth edges. Here’s how you can style it:

@import url('https://fonts.googleapis.com/css?family=Montserrat:400,500,600,700|Poppins:400,500&display=swap');
*{
  margin: 0;
  padding: 0;
  box-sizing: border-box;
  user-select: none;
}
.bg-img{
  background: url('bg.jpg');
  height: 100vh;
  background-size: cover;
  background-position: center;
}
.bg-img:after{
  position: absolute;
  content: '';
  top: 0;
  left: 0;
  height: 100%;
  width: 100%;
  background: rgba(0,0,0,0.7);
}
.content{
  position: absolute;
  top: 50%;
  left: 50%;
  z-index: 999;
  text-align: center;
  padding: 60px 32px;
  width: 370px;
  transform: translate(-50%,-50%);
  background: rgba(255,255,255,0.04);
  box-shadow: -1px 4px 28px 0px rgba(0,0,0,0.75);
}
.content header{
  color: white;
  font-size: 33px;
  font-weight: 600;
  margin: 0 0 35px 0;
  font-family: 'Montserrat',sans-serif;
}
.field{
  position: relative;
  height: 45px;
  width: 100%;
  display: flex;
  background: rgba(255,255,255,0.94);
}
.field span{
  color: #222;
  width: 40px;
  line-height: 45px;
}
.field input{
  height: 100%;
  width: 100%;
  background: transparent;
  border: none;
  outline: none;
  color: #222;
  font-size: 16px;
  font-family: 'Poppins',sans-serif;
}
.space{
  margin-top: 16px;
}
.show{
  position: absolute;
  right: 13px;
  font-size: 13px;
  font-weight: 700;
  color: #222;
  display: none;
  cursor: pointer;
  font-family: 'Montserrat',sans-serif;
}
.pass-key:valid ~ .show{
  display: block;
}
.pass{
  text-align: left;
  margin: 10px 0;
}
.pass a{
  color: white;
  text-decoration: none;
  font-family: 'Poppins',sans-serif;
}
.pass:hover a{
  text-decoration: underline;
}
.field input[type="submit"]{
  background: #3498db;
  border: 1px solid #2691d9;
  color: white;
  font-size: 18px;
  letter-spacing: 1px;
  font-weight: 600;
  cursor: pointer;
  font-family: 'Montserrat',sans-serif;
}
.field input[type="submit"]:hover{
  background: #2691d9;
}
.login{
  color: white;
  margin: 20px 0;
  font-family: 'Poppins',sans-serif;
}
.links{
  display: flex;
  cursor: pointer;
  color: white;
  margin: 0 0 20px 0;
}
.facebook,.instagram{
  width: 100%;
  height: 45px;
  line-height: 45px;
  margin-left: 10px;
}
.facebook{
  margin-left: 0;
  background: #4267B2;
  border: 1px solid #3e61a8;
}
.instagram{
  background: #E1306C;
  border: 1px solid #df2060;
}
.facebook:hover{
  background: #3e61a8;
}
.instagram:hover{
  background: #df2060;
}
.links i{
  font-size: 17px;
}
i span{
  margin-left: 8px;
  font-weight: 500;
  letter-spacing: 1px;
  font-size: 16px;
  font-family: 'Poppins',sans-serif;
}
.signup{
  font-size: 15px;
  color: white;
  font-family: 'Poppins',sans-serif;
}
.signup a{
  color: #3498db;
  text-decoration: none;
}
.signup a:hover{
  text-decoration: underline;
}

Step 3: Adding JavaScript for Toggle Password Visibility

You can add a show/hide password functionality to improve the form’s usability using JavaScript. This will allow users to toggle the visibility of their password, ensuring ease of use.

<script>
  const pass_field = document.querySelector('.pass-key');
  const showBtn = document.querySelector('.show');
  showBtn.addEventListener('click', function(){
   if(pass_field.type === "password"){
     pass_field.type = "text";
     showBtn.textContent = "HIDE";
     showBtn.style.color = "#3498db";
   }else{
     pass_field.type = "password";
     showBtn.textContent = "SHOW";
     showBtn.style.color = "#222";
   }
  });
</script>

Step 4: Ensuring Responsiveness

Add media queries for different screen sizes to ensure the login form looks great on mobile devices. This will ensure the form adjusts its size and layout based on the device’s width.

@media (max-width: 600px) {
.field input[type="submit"]{
  background: red;
  border: 1px solid #2691d9;
  color: white;
  font-size: 18px;
  letter-spacing: 1px;
  font-weight: 600;
  cursor: pointer;
  font-family: 'Montserrat',sans-serif;
}
}
Want to Check Username Availability on Social Media?If you’re looking to check username availability on various social media platforms, visit NameChkr to find out!
Read Also

  1. Glassmorphism Login Form in HTML and CSS
    Explore the stylish world of glassmorphism as you create a modern login form using HTML and CSS. This guide breaks down the design process step by step.
  2. Toggle Button using HTML, CSS, and JavaScript
    Discover how to enhance user interaction by creating a sleek toggle button with HTML, CSS, and JavaScript. This tutorial covers everything from structure to styling.
  3. Responsive Cards in HTML and CSS
    Learn how to design eye-catching responsive cards that adapt seamlessly to any device. This guide offers practical tips for achieving stunning layouts.
  4. Build a Google Gemini Chatbot Using HTML, CSS, and JS
    Dive into chatbot development by creating a Google Gemini chatbot with HTML, CSS, and JavaScript. This tutorial will help you understand the basics of interactive forms.

Conclusion

By following this guide, you now have a beautifully designed Transparent Login Form using HTML, CSS, and JavaScript that’s functional and visually appealing. This login form can easily be customized and integrated into any website, providing a sleek and modern way to handle user authentication.

If you encounter any challenges or want to explore more customization options, feel free to download the complete source code by clicking the button below.

Want to create a cool and sleek vertical card sliding animation for your website with only HTML and CSS? Give a touch of elegance to your website without the clutter of JavaScript! Let’s dive into this comprehensive guide, where we’ll explore how to create a sleek and stylish vertical card slider with smooth animations that require no JavaScript at all. So, let’s experience these smooth animations and modern design, perfect for developers committed to creating fast, adaptable, and SEO-friendly sites.

Whether working on a personal project or building a portfolio, this tutorial will show you how to create a beautiful card slider that performs well across all devices and screens. The best part? It’s entirely built with HTML and CSS, making it easy to implement and maintain.

What is Vertical Card Sliding Animation?

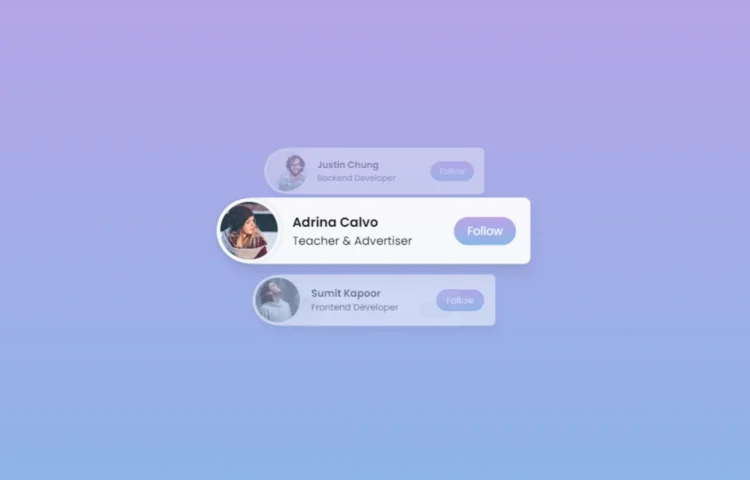
A Vertical Card Sliding Animation is a smooth and modern way to display multiple pieces of content, such as user profiles, testimonials, or products. With this design, several cards slide vertically, one after the other, while maintaining a minimal, clean layout.

This guide will teach you how to build Vertical Card Sliding Animation using only HTML & CSS, focusing on performance and responsiveness. This design helps capture user attention and provides a dynamic display of essential content in a small space.

Why Choose HTML & CSS for Vertical Card Sliding Animation?

There are several reasons to create this animation using only HTML and CSS:

  1. Performance: A CSS-only solution is much lighter than JavaScript-based animations, meaning faster load times and better performance on mobile and desktop devices.
  2. SEO Benefits: Since this animation does not rely on JavaScript, it helps maintain clean, crawlable code, improving your website’s search engine optimization (SEO).
  3. Cross-Browser Compatibility: All modern browsers widely support Pure CSS animations, ensuring a seamless experience for your users.
  4. Ease of Maintenance: A simpler codebase with only HTML and CSS is more effortless to maintain and modify, making it more adaptable to future changes or enhancements.

Focusing on a Vertical Card Sliding Animation using only HTML and CSS will create a visually appealing design while keeping your website efficient and user-friendly.

Key Features of Vertical Card Sliding Animation

Here are the standout features you’ll learn to create in this tutorial:

  • Vertical Sliding Animation: The cards slide up and down smoothly.
  • Hover Effect: When you hover over a card, the animation pauses, allowing users to focus on the content.
  • Fade-In Effect: The central card remains fully visible, while the surrounding cards fade subtlely, adding to the aesthetic.
  • Responsive Design: The card slider will adjust to different screen sizes, ensuring it looks great on mobile, tablet, and desktop devices.
  • Minimalist Layout: The design is clean and modern, making it perfect for any website that values simplicity and user interaction.

Step-by-Step Guide to Creating Vertical Card Sliding Animation Using Only HTML & CSS
Let’s break down how to build this Vertical Card Sliding Animation using only HTML & CSS step by step.

Step 1: Setting Up the HTML Structure

The first step is creating the basic HTML structure for your card slider. This will include profile pictures, names, job titles, and a button for interaction. Here’s the initial HTML:

<!DOCTYPE html>
 
<!-- Coding By abhikesh - abhikesh.com -->
 
<html lang="en">
 
<head>
 
  <meta charset="UTF-8">
 
  <meta name="viewport" content="width=device-width, initial-scale=1.0">
 
  <title>Vertical Card Slider | abhikesh</title>
 
  <link rel="stylesheet" href="style.css">
 
</head>
 
<body>
 
  <div class="wrapper">
 
    <div class="outer">
 
      <div class="card" style="--delay:-1;">
 
        <div class="content">
 
          <div class="img"><img src="images/img-1.jpg" alt=""></div>
 
          <div class="details">
 
            <span class="name">Rahul Kapoor</span>
 
            <p>Frontend Developer</p>
 
          </div>
 
        </div>
 
        <a href="#">Follow</a>
 
      </div>
 
      <div class="card" style="--delay:0;">
 
        <div class="content">
 
          <div class="img"><img src="images/img-2.jpg" alt=""></div>
 
          <div class="details">
 
            <span class="name">Romiyo Neil</span>
 
            <p>YouTuber & Blogger</p>
 
          </div>
 
        </div>
 
        <a href="#">Follow</a>
 
      </div>
 
      <div class="card" style="--delay:1;">
 
        <div class="content">
 
          <div class="img"><img src="images/img-3.jpg" alt=""></div>
 
          <div class="details">
 
            <span class="name">Jasmine Carter</span>
 
            <p>Freelancer & Vlogger</p>
 
          </div>
 
        </div>
 
        <a href="#">Follow</a>
 
      </div>
 
      <div class="card" style="--delay:2;">
 
        <div class="content">
 
          <div class="img"><img src="images/img-4.jpg" alt=""></div>
 
          <div class="details">
 
            <span class="name">Justin Chung</span>
 
            <p>Backend Developer</p>
 
          </div>
 
        </div>
 
        <a href="#">Follow</a>
 
      </div>
 
      <div class="card" style="--delay:2;">
 
        <div class="content">
 
          <div class="img"><img src="images/img-5.jpg" alt=""></div>
 
          <div class="details">
 
            <span class="name">Adrina Calvo</span>
 
            <p>Teacher & Advertiser</p>
 
          </div>
 
        </div>
 
        <a href="#">Follow</a>
 
      </div>
 
    </div>
 
  </div>
 
</body>
 
</html>

This simple HTML provides the foundation for your Vertical Card Sliding Animation using only HTML & CSS.

Step 2: Applying CSS Styling and Animation

Next, let’s style the card slider using CSS. We’ll use Flexbox for layout, and CSS animations will create the vertical sliding effect.

@import url('https://fonts.googleapis.com/css2?family=Poppins:wght@200;300;400;500;600;700&display=swap');
 
*{
 
  margin: 0;
 
  padding: 0;
 
  box-sizing: border-box;
 
  font-family: "Poppins", sans-serif;
 
}
 
body{
 
  width: 100%;
 
  height: 100vh;
 
  display: flex;
 
  align-items: center;
 
  justify-content: center;
 
  background: linear-gradient(to bottom, #bea2e7 0%, #86b7e7 100%);
 
}
 
.wrapper .outer{
 
  display: flex;
 
  align-items: center;
 
  justify-content: center;
 
}
 
.wrapper .card{
 
  background: #fff;
 
  width: 430px;
 
  display: flex;
 
  align-items: center;
 
  padding: 20px;
 
  opacity: 0;
 
  pointer-events: none;
 
  position: absolute;
 
  justify-content: space-between;
 
  border-radius: 100px 20px 20px 100px;
 
  box-shadow: 0px 10px 15px rgba(0,0,0,0.1);
 
  animation: animate 15s linear infinite;
 
  animation-delay: calc(3s * var(--delay));
 
}
 
.outer:hover .card{
 
  animation-play-state: paused;
 
}
 
.wrapper .card:last-child{
 
  animation-delay: calc(-3s * var(--delay));
 
}
 
@keyframes animate {
 
  0%{
 
    opacity: 0;
 
    transform: translateY(100%) scale(0.5);
 
  }
 
  5%, 20%{
 
    opacity: 0.4;
 
    transform: translateY(100%) scale(0.7);
 
  }
 
  25%, 40%{
 
    opacity: 1;
 
    pointer-events: auto;
 
    transform: translateY(0%) scale(1);
 
  }
 
  45%, 60%{
 
    opacity: 0.4;
 
    transform: translateY(-100%) scale(0.7);
 
  }
 
  65%, 100%{
 
    opacity: 0;
 
    transform: translateY(-100%) scale(0.5);
 
  }
 
}
 
.card .content{
 
  display: flex;
 
  align-items: center;
 
}
 
.wrapper .card .img{
 
  height: 90px;
 
  width: 90px;
 
  position: absolute;
 
  left: -5px;
 
  background: #fff;
 
  border-radius: 50%;
 
  padding: 5px;
 
  box-shadow: 0px 0px 5px rgba(0,0,0,0.2);
 
}
 
.card .img img{
 
  height: 100%;
 
  width: 100%;
 
  border-radius: 50%;
 
  object-fit: cover;
 
}
 
.card .details{
 
  margin-left: 80px;
 
}
 
.details span{
 
  font-weight: 600;
 
  font-size: 18px;
 
}
 
.card a{
 
  text-decoration: none;
 
  padding: 7px 18px;
 
  border-radius: 25px;
 
  color: #fff;
 
  background: linear-gradient(to bottom, #bea2e7 0%, #86b7e7 100%);
 
  transition: all 0.3s ease;
 
}
 
.card a:hover{
 
  transform: scale(0.94);
 
}

This CSS will create the vertical sliding animation that brings the cards in and out of view.

Step 3: Making the Design Responsive with Media Queries

Use media queries for responsive design to ensure that your card slider looks perfect on all devices. This allows the slider to adapt to smaller screens.

@media (max-width: 600px) {
 
  .card a {
 
    text-decoration: none;
 
    padding: 7px 18px;
 
    border-radius: 25px;
 
    color: red;
 
    background: linear-gradient(to bottom, #bea2e7 0%, #86b7e7 100%);
 
    transition: all 0.3s ease;
 
  }
 
  .card a:hover {
 
    transform: scale(0.94);
 
  }
 
}

Benefits of Using Pure HTML & CSS for Animations

Why should you opt for a solution using only HTML and CSS? Here are some key reasons:

  • No JavaScript Dependency: You don’t need to load additional libraries, reducing page weight and load times.
  • Improved SEO: Clean HTML and CSS are more search engine friendly than JavaScript-heavy solutions.
  • Accessibility: CSS animations are inherently accessible and work across various devices and browsers.
  • Faster Development Time: With fewer dependencies, the development process is more rapid, and debugging is simpler.

Utilizing only HTML and CSS for this vertical sliding card animation ensures your design is lightweight, high-performing, and easy to maintain.

Want to Check Username Availability on Social Media?If you’re looking to check username availability on various social media platforms, visit NameChkr to find out!
Read Also

  1. Glassmorphism Login Form in HTML and CSS
    Explore the stylish world of glassmorphism as you create a modern login form using HTML and CSS. This guide breaks down the design process step by step.
  2. Toggle Button using HTML, CSS, and JavaScript
    Discover how to enhance user interaction by creating a sleek toggle button with HTML, CSS, and JavaScript. This tutorial covers everything from structure to styling.
  3. Responsive Cards in HTML and CSS
    Learn how to design eye-catching responsive cards that adapt seamlessly to any device. This guide offers practical tips for achieving stunning layouts.
  4. Build a Google Gemini Chatbot Using HTML, CSS, and JS
    Dive into chatbot development by creating a Google Gemini chatbot with HTML, CSS, and JavaScript. This tutorial will help you understand the basics of interactive forms.

Conclusion

Creating a Vertical Card Sliding Animation using only HTML and CSS is an excellent way to add an engaging and interactive element to your website. This design is perfect for portfolios, business websites, and personal blogs. Avoiding JavaScript and relying solely on CSS animations enhances user experience and SEO performance while maintaining a simple and clean codebase.

Feel free to customize the design further to suit your project needs. If you encounter any difficulties or want to access the complete source code, don’t hesitate to download it using the link below.

Download the Source Code

Need the complete source code for this Vertical Card Sliding Animation using only HTML & CSS? Click the button below to get the full package and start building your interactive card slider today!

Are you looking for a simple yet stylish animated profile card design using only HTML and CSS? You’re in the right place! In this blog post, we’ll walk through creating an animated profile card that showcases a person’s profile details and some sleek animation effects. This design is perfect for portfolio websites, personal branding pages, or anywhere you want to present an individual’s identity confidently.

Whether you’re a beginner or an experienced developer, this tutorial will help you build a functional and aesthetically pleasing profile card. And the best part? No JavaScript is needed—everything is achieved with pure HTML and CSS!

What is a Profile Card?

A profile card is a visual representation of a person’s basic information. It typically includes the individual’s name, job title, social media links, and sometimes a photo. This compact way to present essential details about someone is commonly used on personal websites, business platforms, or portfolio pages.

Why Use HTML & CSS for Profile Cards?

Using only HTML and CSS for your profile card design ensures the code remains lightweight, fast to load, and easy to manage. No heavy JavaScript libraries are required, making your website more accessible and SEO-friendly.

With just HTML for structure and CSS for styling, you can create a clean and professional-looking profile card that looks great and performs well across all devices.

Features of Our Animated Profile Card

This animated profile card design includes the following features:

  • A visually appealing layout with a picture, name, job title, and social media icons.
  • A button that toggles the profile card’s visibility with sliding animations.
  • Smooth animations for social media icons when hovered.
  • Flexible layout optimized for all screen sizes.

Now, let’s explore the steps to bring this design to life!

Step-by-Step Guide to Building the Animated Profile Card

Step 1: Building the HTML Structure

The straightforward HTML structure includes elements like the profile image, name, job title, social media icons, and a button. Here’s how you can structure it:

<!DOCTYPE html>
<!-- Website - www.abhikesh.com -->
<html lang="en" dir="ltr">
<head>
  <meta charset="UTF-8" />
  <title>Animated Profile Card HTML CSS | CodingNepal</title>
  <link rel="stylesheet" href="style.css" />
  <script src="https://kit.fontawesome.com/a076d05399.js"></script>
</head>
<body>
  <div class="main-box">
    <div class="content">
      <input type="checkbox" id="check" />
      <label class="box" for="check">
        <div class="share">SHARE</div>
        <div class="cancel">CANCEL</div>
      </label>
      <div class="image-box">
        <img src="james.jpeg" alt="" />
        <div class="about">
          <div class="details">
            <div class="name">Abhikesh</div>
            <div class="job">Devoloper | Designer</div>
            <div class="icon">
              <a href="#"><i class="fab fa-facebook-f"></i></a>
              <a href="#"><i class="fab fa-twitter"></i></a>
              <a href="#"><i class="fab fa-instagram"></i></a>
              <a href="#"><i class="fab fa-youtube"></i></a>
            </div>
          </div>
        </div>
      </div>
    </div>
  </div>
</body>
</html>

Step 2: Styling the Profile Card with CSS

Next, we’ll use CSS to style the card. We’ll apply Flexbox to centre the content and give the profile card a sleek look with modern design elements.

@import url("https://fonts.googleapis.com/css2?family=Poppins:wght@200;300;400;500;600;700&display=swap");
* {
  margin: 0;
  padding: 0;
  box-sizing: border-box;
  font-family: "Poppins", sans-serif;
}
body {
  background: #3498db;
}
.main-box {
  position: absolute;
  left: 50%;
  top: 50%;
  transform: translate(-50%, -50%);
  width: 400px;
  height: 550px;
  text-align: center;
}
.main-box .content {
  position: relative;
  height: 100%;
  width: 100%;
}
.content .box {
  position: absolute;
  height: 50px;
  width: 100%;
  left: 0;
  bottom: 0;
  border-radius: 25px;
  cursor: pointer;
}
.share,
.cancel {
  position: absolute;
  height: 100%;
  width: 100%;
  left: 0;
  top: 0;
  font-size: 20px;
  font-weight: 600;
  color: #2980b9;
  line-height: 50px;
  background: #fff;
  letter-spacing: 1px;
  border-radius: 25px;
  opacity: 0;
  transition: all 0.3s ease;
}
.content .box .share {
  opacity: 1;
}
#check:checked ~ .box .share {
  opacity: 0;
}
#check:checked ~ .box .cancel {
  opacity: 1;
}
.content .image-box {
  position: absolute;
  height: 450px;
  width: 100%;
  bottom: 130px;
  left: 50%;
  transform: translateX(-50%);
  background: #fff;
  padding: 10px;
  border-radius: 25px;
  transition: all 0.4s ease;
}
#check:checked ~ .image-box {
  bottom: 70px;
}
#check {
  display: none;
}
.image-box::before {
  position: absolute;
  content: "";
  bottom: -12px;
  left: 50%;
  transform: translateX(-50%) rotate(45deg);
  height: 30px;
  width: 30px;
  background: #fff;
  z-index: -1;
}
.image-box img {
  height: 100%;
  width: 100%;
  object-fit: cover;
  border-radius: 26px;
}
.image-box .about {
  position: absolute;
  background: rgba(0, 0, 0, 0.5);
  height: 100%;
  width: 100%;
  left: 0;
  top: 0;
  border-radius: 25px;
  padding: 20px;
  text-align: center;
  opacity: 0;
  transition: all 0.3s ease;
}
#check:checked ~ .image-box .about {
  opacity: 1;
}
.about .details {
  position: absolute;
  width: 100%;
  left: 0;
  bottom: 35px;
}
.details .name,
.job {
  font-size: 18px;
  font-weight: 500;
  color: #fff;
}

Step 3: Adding Animations

CSS animations bring life to your profile card. We’ll add simple sliding and hover effects for the social media icons and use a button to control the visibility of the profile card.

.details .icon i {
  font-size: 20px;
  color: #fff;
  height: 45px;
  width: 45px;
  line-height: 43px;
  border-radius: 50%;
  border: 2px solid #fff;
  margin: 14px 5px;
  transition: all 0.3s ease;
}
.details .icon i:hover {
  transform: scale(0.95);
}

Step 4: Making the Profile Card Responsive
You’ll want to add media queries to ensure your profile card looks great on all devices. This will allow the card to resize and adjust its layout based on the screen size.

@media screen and (max-width: 768px) {
.image-box .about {
  position: absolute;
  background: rgba(0, 0, 0, 0.5);
  height: 100%;
  width: 100%;
  left: 0;
  top: 0;
  border-radius: 25px;
  padding: 20px;
  text-align: center;
  opacity: 0;
  transition: all 0.3s ease;
}
}
Want to Check Username Availability on Social Media?If you’re looking to check username availability on various social media platforms, visit NameChkr to find out!
Read Also

  1. Glassmorphism Login Form in HTML and CSS
    Explore the stylish world of glassmorphism as you create a modern login form using HTML and CSS. This guide breaks down the design process step by step.
  2. Toggle Button using HTML, CSS, and JavaScript
    Discover how to enhance user interaction by creating a sleek toggle button with HTML, CSS, and JavaScript. This tutorial covers everything from structure to styling.
  3. Responsive Cards in HTML and CSS
    Learn how to design eye-catching responsive cards that adapt seamlessly to any device. This guide offers practical tips for achieving stunning layouts.
  4. Build a Google Gemini Chatbot Using HTML, CSS, and JS
    Dive into chatbot development by creating a Google Gemini chatbot with HTML, CSS, and JavaScript. This tutorial will help you understand the basics of interactive forms.

Conclusion

Building an animated profile card using only HTML and CSS is a great way to add interactive, visually appealing elements to your website. By keeping it simple, lightweight, and responsive, you can ensure that your profile card performs well on all devices.

Whether using this card for your portfolio, business site, or personal blog, you now have a versatile and engaging way to display your profile information.

Download the Source Code

If you want to dive deeper or face any issues while creating the animated profile card, please download the complete source code below.

If you’re interested in learning how to create a clean and efficient Mega and Dropdown Menu using only HTML & CSS, you’re in the right place! In this tutorial, we will walk through how to build a fully functional mega and dropdown menu navigation bar using just HTML and CSS—no JavaScript needed!

Mega and Dropdown Menu are becoming increasingly popular on websites with complex structures or multiple categories. In contrast, a dropdown menu is a simpler form of navigation. Combining both in a responsive menu ensures that your visitors enjoy a smooth user experience, regardless of their device.

Whether you’re a beginner or a seasoned developer, this guide will help you design a visually appealing, responsive menu for your site. We’ll explore the essential HTML structure, CSS styling, and how to ensure your navigation bar looks great on all devices.

What is a Responsive Mega and Dropdown Menu?

A Responsive Mega and Dropdown Menu is a website navigation system that combines the simplicity of a dropdown menu with the functionality of a mega menu. A dropdown menu displays a list of items when you hover or click on a parent link. In contrast, a mega menu presents multiple columns of links and additional content like categories or product lists.

When built with pure HTML and CSS, these menus become lightweight, fast-loading, and compatible across browsers without needing JavaScript.

Benefits of Using Only HTML & CSS

Building a Responsive Mega and Dropdown Menu using only HTML and CSS offers several advantages:

  • Performance: HTML and CSS menus are lightweight and don’t require heavy JavaScript libraries, ensuring fast load times for your website.
  • SEO: Search engines can easily crawl and index HTML content, improving your website’s visibility.
  • Accessibility: HTML and CSS menus work seamlessly on most devices and assistive technologies.
  • Responsiveness: CSS media queries allow you to create a fully responsive menu for mobile devices.

Now, let’s get into how to create a Responsive Mega Menu and Dropdown Menu using only HTML & CSS step by step.

Step-by-Step Guide to Building a Responsive Mega and Dropdown Menu with Just HTML & CSS
Creating a Responsive Mega and Dropdown Menu is straightforward if you break it down into steps. Here’s the complete process:

Step 1: Building the HTML Structure

To begin, we will establish the foundational structure of the mega and dropdown menu with HTML. This will include a navbar containing links, dropdown items, and mega menu sections. Below is a sample code snippet to help you get started:

<!DOCTYPE html>
<!-- Created By abhikesh - www.abhikesh.com -->
<html lang="en">
<head>
    <meta charset="UTF-8">
    <meta name="viewport" content="width=device-width, initial-scale=1.0">
    <title>Responsive Mega Menu | abhikesh</title>
    <link rel="stylesheet" href="style.css">
    <link rel="stylesheet" href="https://cdnjs.cloudflare.com/ajax/libs/font-awesome/5.15.3/css/all.min.css"/>
</head>
<body>
  <nav>
    <div class="wrapper">
      <div class="logo"><a href="#">Abhikesh</a></div>
      <input type="radio" name="slider" id="menu-btn">
      <input type="radio" name="slider" id="close-btn">
      <ul class="nav-links">
        <label for="close-btn" class="btn close-btn"><i class="fas fa-times"></i></label>
        <li><a href="#">Home</a></li>
        <li><a href="#">About</a></li>
        <li>
          <a href="#" class="desktop-item">Dropdown Menu</a>
          <input type="checkbox" id="showDrop">
          <label for="showDrop" class="mobile-item">Dropdown Menu</label>
          <ul class="drop-menu">
            <li><a href="#">Drop menu 1</a></li>
            <li><a href="#">Drop menu 2</a></li>
            <li><a href="#">Drop menu 3</a></li>
            <li><a href="#">Drop menu 4</a></li>
          </ul>
        </li>
        <li>
          <a href="#" class="desktop-item">Mega Menu</a>
          <input type="checkbox" id="showMega">
          <label for="showMega" class="mobile-item">Mega Menu</label>
          <div class="mega-box">
            <div class="content">
              <div class="row">
                <img src="img.jpg" alt="">
              </div>
              <div class="row">
                <header>Design Services</header>
                <ul class="mega-links">
                  <li><a href="#">Graphics</a></li>
                  <li><a href="#">Vectors</a></li>
                  <li><a href="#">Business cards</a></li>
                  <li><a href="#">Custom logo</a></li>
                </ul>
              </div>
              <div class="row">
                <header>Email Services</header>
                <ul class="mega-links">
                  <li><a href="#">Personal Email</a></li>
                  <li><a href="#">Business Email</a></li>
                  <li><a href="#">Mobile Email</a></li>
                  <li><a href="#">Web Marketing</a></li>
                </ul>
              </div>
              <div class="row">
                <header>Security services</header>
                <ul class="mega-links">
                  <li><a href="#">Site Seal</a></li>
                  <li><a href="#">VPS Hosting</a></li>
                  <li><a href="#">Privacy Seal</a></li>
                  <li><a href="#">Website design</a></li>
                </ul>
              </div>
            </div>
          </div>
        </li>
        <li><a href="#">Feedback</a></li>
      </ul>
      <label for="menu-btn" class="btn menu-btn"><i class="fas fa-bars"></i></label>
    </div>
  </nav>
  <div class="body-text">
    <div class="title">Responsive Dropdown and Mega Menu</div>
    <div class="sub-title">using only HTML & CSS</div>
  </div>
</body>
</html>

Step 2: Styling the Mega Menu with CSS

Next, we’ll style the navigation bar, dropdown menu, and mega menu using CSS. The menu will have a modern look with a clean design, suitable for any professional website. Below is an example of CSS styling:

@import url('https://fonts.googleapis.com/css2?family=Poppins:wght@200;300;400;500;600;700&display=swap');
* {
  margin: 0;
  padding: 0;
  box-sizing: border-box;
  font-family: 'Poppins', sans-serif;
}
nav {
  position: fixed;
  z-index: 99;
  width: 100%;
  background: #242526;
}
nav .wrapper {
  position: relative;
  max-width: 1300px;
  padding: 0px 30px;
  height: 70px;
  line-height: 70px;
  margin: auto;
  display: flex;
  align-items: center;
  justify-content: space-between;
}
.wrapper .logo a {
  color: #f2f2f2;
  font-size: 30px;
  font-weight: 600;
  text-decoration: none;
}
.wrapper .nav-links {
  display: inline-flex;
}
.nav-links li {
  list-style: none;
}
.nav-links li a {
  color: #f2f2f2;
  text-decoration: none;
  font-size: 18px;
  font-weight: 500;
  padding: 9px 15px;
  border-radius: 5px;
  transition: all 0.3s ease;
}
.nav-links li a:hover {
  background: #3A3B3C;
}
.nav-links .mobile-item {
  display: none;
}
.nav-links .drop-menu {
  position: absolute;
  background: #242526;
  width: 180px;
  line-height: 45px;
  top: 85px;
  opacity: 0;
  visibility: hidden;
  box-shadow: 0 6px 10px rgba(0, 0, 0, 0.15);
}
.nav-links li:hover .drop-menu,
.nav-links li:hover .mega-box {
  transition: all 0.3s ease;
  top: 70px;
  opacity: 1;
  visibility: visible;
}
.drop-menu li a {
  width: 100%;
  display: block;
  padding: 0 0 0 15px;
  font-weight: 400;
  border-radius: 0px;
}
.mega-box {
  position: absolute;
  left: 0;
  width: 100%;
  padding: 0 30px;
  top: 85px;
  opacity: 0;
  visibility: hidden;
}
.mega-box .content {
  background: #242526;
  padding: 25px 20px;
  display: flex;
  width: 100%;
  justify-content: space-between;
  box-shadow: 0 6px 10px rgba(0, 0, 0, 0.15);
}
.mega-box .content .row {
  width: calc(25% - 30px);
  line-height: 45px;
}
.content .row img {
  width: 100%;
  height: 100%;
  object-fit: cover;
}
.content .row header {
  color: #f2f2f2;
  font-size: 20px;
  font-weight: 500;
}
.content .row .mega-links {
  margin-left: -40px;
  border-left: 1px solid rgba(255, 255, 255, 0.09);
}
.row .mega-links li {
  padding: 0 20px;
}
.row .mega-links li a {
  padding: 0px;
  padding: 0 20px;
  color: #d9d9d9;
  font-size: 17px;
  display: block;
}
.row .mega-links li a:hover {
  color: #f2f2f2;
}
.wrapper .btn {
  color: #fff;
  font-size: 20px;
  cursor: pointer;
  display: none;
}
.wrapper .btn.close-btn {
  position: absolute;
  right: 30px;
  top: 10px;
}
nav input {
  display: none;
}
.body-text {
  position: absolute;
  top: 50%;
  left: 50%;
  transform: translate(-50%, -50%);
  width: 100%;
  text-align: center;
  padding: 0 30px;
}
.body-text div {
  font-size: 45px;
  font-weight: 600;
}
Step 3: Adding Responsiveness
To make our Responsive Mega and Dropdown Menu adapt to different screen sizes, we’ll use CSS media queries. This ensures the menu looks good on both desktop and mobile devices. Here’s how to do it:
@media screen and (max-width: 970px) {
  .wrapper .btn {
    display: block;
  }
  .wrapper .nav-links {
    position: fixed;
    height: 100vh;
    width: 100%;
    max-width: 350px;
    top: 0;
    left: -100%;
    background: #242526;
    display: block;
    padding: 50px 10px;
    line-height: 50px;
    overflow-y: auto;
    box-shadow: 0px 15px 15px rgba(0, 0, 0, 0.18);
    transition: all 0.3s ease;
  }
  /* custom scroll bar */
  ::-webkit-scrollbar {
    width: 10px;
  }
  ::-webkit-scrollbar-track {
    background: #242526;
  }
  ::-webkit-scrollbar-thumb {
    background: #3A3B3C;
  }
  #menu-btn:checked~.nav-links {
    left: 0%;
  }
  #menu-btn:checked~.btn.menu-btn {
    display: none;
  }
  #close-btn:checked~.btn.menu-btn {
    display: block;
  }
  .nav-links li {
    margin: 15px 10px;
  }
  .nav-links li a {
    padding: 0 20px;
    display: block;
    font-size: 20px;
  }
  .nav-links .drop-menu {
    position: static;
    opacity: 1;
    top: 65px;
    visibility: visible;
    padding-left: 20px;
    width: 100%;
    max-height: 0px;
    overflow: hidden;
    box-shadow: none;
    transition: all 0.3s ease;
  }
  #showDrop:checked~.drop-menu,
  #showMega:checked~.mega-box {
    max-height: 100%;
  }
  .nav-links .desktop-item {
    display: none;
  }
  .nav-links .mobile-item {
    display: block;
    color: #f2f2f2;
    font-size: 20px;
    font-weight: 500;
    padding-left: 20px;
    cursor: pointer;
    border-radius: 5px;
    transition: all 0.3s ease;
  }
  .nav-links .mobile-item:hover {
    background: #3A3B3C;
  }
  .drop-menu li {
    margin: 0;
  }
  .drop-menu li a {
    border-radius: 5px;
    font-size: 18px;
  }
  .mega-box {
    position: static;
    top: 65px;
    opacity: 1;
    visibility: visible;
    padding: 0 20px;
    max-height: 0px;
    overflow: hidden;
    transition: all 0.3s ease;
  }
  .mega-box .content {
    box-shadow: none;
    flex-direction: column;
    padding: 20px 20px 0 20px;
  }
  .mega-box .content .row {
    width: 100%;
    margin-bottom: 15px;
    border-top: 1px solid rgba(255, 255, 255, 0.08);
  }
  .mega-box .content .row:nth-child(1),
  .mega-box .content .row:nth-child(2) {
    border-top: 0px;
  }
  .content .row .mega-links {
    border-left: 0px;
    padding-left: 15px;
  }
  .row .mega-links li {
    margin: 0;
  }
  .content .row header {
    font-size: 19px;
  }
}

With these media queries, the navigation menu will stack vertically on smaller screens, and the mega menu will adjust to fit the width of the screen.

Want to Check Username Availability on Social Media?If you’re looking to check username availability on various social media platforms, visit NameChkr to find out!
Read Also

  1. Glassmorphism Login Form in HTML and CSS
    Explore the stylish world of glassmorphism as you create a modern login form using HTML and CSS. This guide breaks down the design process step by step.
  2. Toggle Button using HTML, CSS, and JavaScript
    Discover how to enhance user interaction by creating a sleek toggle button with HTML, CSS, and JavaScript. This tutorial covers everything from structure to styling.
  3. Responsive Cards in HTML and CSS
    Learn how to design eye-catching responsive cards that adapt seamlessly to any device. This guide offers practical tips for achieving stunning layouts.
  4. Build a Google Gemini Chatbot Using HTML, CSS, and JS
    Dive into chatbot development by creating a Google Gemini chatbot with HTML, CSS, and JavaScript. This tutorial will help you understand the basics of interactive forms.

Conclusion

Building a Responsive Mega and Dropdown Menu using only HTML and CSS is a great way to enhance your website’s navigation without relying on JavaScript. This approach provides a lightweight, fast-loading solution that is both accessible and SEO-friendly. You now have a responsive, clean, and professional menu that adapts seamlessly across different screen sizes.

If you run into any issues while coding or need further guidance, feel free to download the source code below.

Download Source Code

To get the full source code for this Responsive Mega and Dropdown Menu using only HTML & CSS, click the button below: