Hello friends, in this blog post, you will learn how to build a functional contact form in PHP. This form will utilize HTML, CSS, JavaScript, and PHP to create a fully functional contact system for your website. Contact forms enable visitors to reach out directly to the site owner. In this tutorial, you’ll see how to create a functional PHP contact form that includes fields for user information like their name, email address, and message subject.
The functional contact form in PHP is vital to any website as it allows seamless communication between users and the website owner. You can customize this form’s fields based on your website’s needs. This project ensures validation to guarantee users input valid email addresses and messages.
Why Build a Functional Contact Form in PHP?
- Direct Communication: A contact form allows users to communicate directly with you, avoiding the need for them to open an email client.
- Data Validation: The form ensures that valid emails and messages are submitted, reducing spam and errors.
- Customization: You can customize the form fields to gather more data or offer specific queries.
How the Functional PHP Contact Form Works
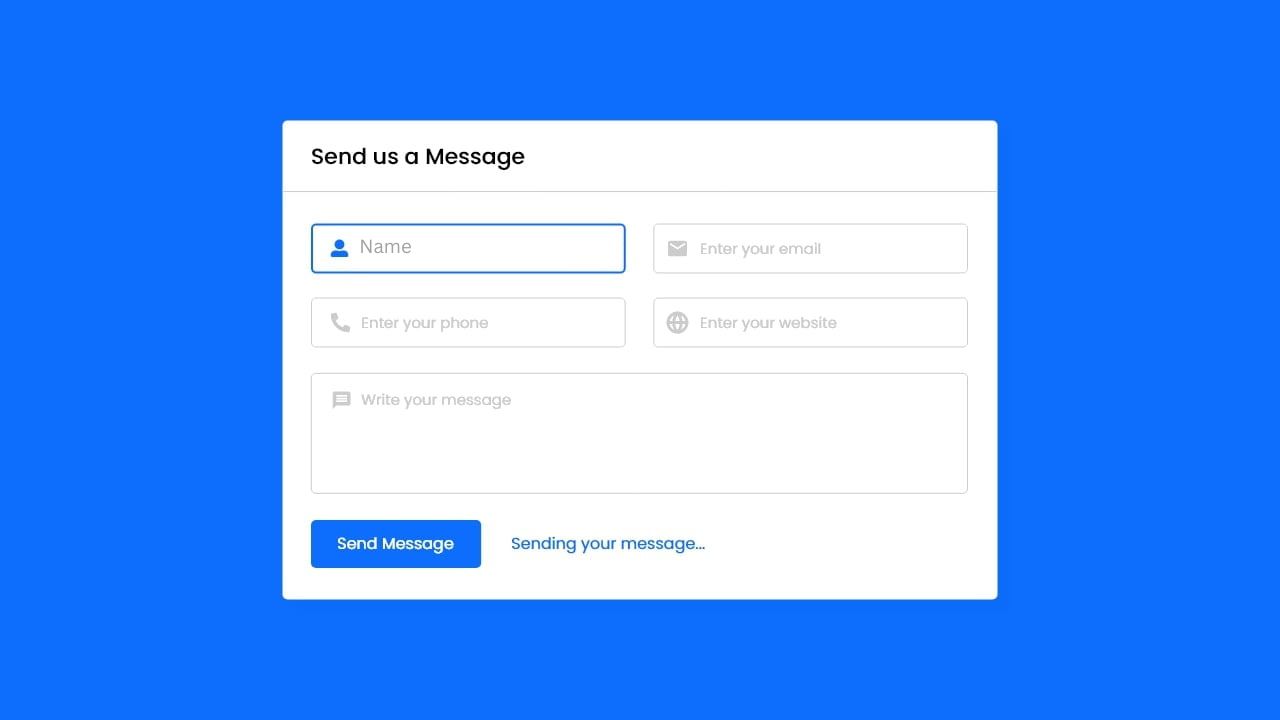
This functional contact form in PHP has dynamic status text that indicates whether a message has been successfully sent. The form is fully validated using JavaScript, so users must enter a valid email and message before submitting.
Unlike traditional contact forms that refresh the page upon submission, this contact form uses Ajax. It sends all form data (name, email, phone, message) through Ajax to a PHP script, which processes the information and sends it via email using the PHP mail() function.
Steps to Create a Functional PHP Contact Form
- Create the HTML File: Name the file index.html, and include form fields like name, email, and message. This is the structure of the contact form.
<!DOCTYPE html>
<html lang="en">
<head>
  <meta charset="UTF-8">
  <meta name="viewport" content="width=device-width, initial-scale=1.0">
  <title>Contact Form in PHP</title>
  <link rel="stylesheet" href="style.css">
  <link rel="stylesheet" href="https://fonts.googleapis.com/icon?family=Material+Icons">
  <link rel="stylesheet" href="https://cdnjs.cloudflare.com/ajax/libs/font-awesome/5.15.3/css/all.min.css"/>
</head>
<body>
  <div class="wrapper">
    <header>Send us a Message</header>
    <form action="#">
      <div class="dbl-field">
        <div class="field">
          <input type="text" name="name" placeholder="Enter your name">
          <i class='fas fa-user'></i>
        </div>
        <div class="field">
          <input type="text" name="email" placeholder="Enter your email">
          <i class='fas fa-envelope'></i>
        </div>
      </div>
      <div class="dbl-field">
        <div class="field">
          <input type="text" name="phone" placeholder="Enter your phone">
          <i class='fas fa-phone-alt'></i>
        </div>
        <div class="field">
          <input type="text" name="website" placeholder="Enter your website">
          <i class='fas fa-globe'></i>
        </div>
      </div>
      <div class="message">
        <textarea placeholder="Write your message" name="message"></textarea>
        <i class="material-icons">message</i>
      </div>
      <div class="button-area">
        <button type="submit">Send Message</button>
        <span></span>
      </div>
    </form>
  </div>
  <script src="script.js"></script>
</body>
</html>
2. Create the CSS File: Name it style.css, and apply styles to make the form look professional and responsive.
/* Import Google font - Poppins */
@import url('https://fonts.googleapis.com/css2?family=Poppins:wght@400;500;600&display=swap');
*{
  margin: 0;
  padding: 0;
  box-sizing: border-box;
  font-family: "Poppins", sans-serif;
}
body{
  display: flex;
  padding: 0 10px;
  min-height: 100vh;
  background: #0D6EFD;
  align-items: center;
  justify-content: center;
}
::selection{
  color: #fff;
  background: #0D6EFD;
}
.wrapper{
  width: 715px;
  background: #fff;
  border-radius: 5px;
  box-shadow: 10px 10px 10px rgba(0,0,0,0.05);
}
.wrapper header{
  font-size: 22px;
  font-weight: 600;
  padding: 20px 30px;
  border-bottom: 1px solid #ccc;
}
.wrapper form{
  margin: 35px 30px;
}
.wrapper form.disabled{
  pointer-events: none;
  opacity: 0.7;
}
form .dbl-field{
  display: flex;
  margin-bottom: 25px;
  justify-content: space-between;
}
.dbl-field .field{
  height: 50px;
  display: flex;
  position: relative;
  width: calc(100% / 2 - 13px);
}
.wrapper form i{
  position: absolute;
  top: 50%;
  left: 18px;
  color: #ccc;
  font-size: 17px;
  pointer-events: none;
  transform: translateY(-50%);
}
form .field input,
form .message textarea{
  width: 100%;
  height: 100%;
  outline: none;
  padding: 0 18px 0 48px;
  font-size: 16px;
  border-radius: 5px;
  border: 1px solid #ccc;
}
.field input::placeholder,
.message textarea::placeholder{
  color: #ccc;
}
.field input:focus,
.message textarea:focus{
  padding-left: 47px;
  border: 2px solid #0D6EFD;
}
.field input:focus ~ i,
.message textarea:focus ~ i{
  color: #0D6EFD;
}
form .message{
  position: relative;
}
form .message i{
  top: 30px;
  font-size: 20px;
}
form .message textarea{
  min-height: 130px;
  max-height: 230px;
  max-width: 100%;
  min-width: 100%;
  padding: 15px 20px 0 48px;
}
form .message textarea::-webkit-scrollbar{
  width: 0px;
}
.message textarea:focus{
  padding-top: 14px;
}
form .button-area{
  margin: 25px 0;
  display: flex;
  align-items: center;
}
.button-area button{
  color: #fff;
  border: none;
  outline: none;
  font-size: 18px;
  cursor: pointer;
  border-radius: 5px;
  padding: 13px 25px;
  background: #0D6EFD;
  transition: background 0.3s ease;
}
.button-area button:hover{
  background: #025ce3;
}
.button-area span{
  font-size: 17px;
  margin-left: 30px;
  display: none;
}
@media (max-width: 600px){
  .wrapper header{
    text-align: center;
  }
  .wrapper form{
    margin: 35px 20px;
  }
  form .dbl-field{
    flex-direction: column;
    margin-bottom: 0px;
  }
  form .dbl-field .field{
    width: 100%;
    height: 45px;
    margin-bottom: 20px;
  }
  form .message textarea{
    resize: none;
  }
  form .button-area{
    margin-top: 20px;
    flex-direction: column;
  }
  .button-area button{
    width: 100%;
    padding: 11px 0;
    font-size: 16px;
  }
  .button-area span{
    margin: 20px 0 0;
    text-align: center;
  }
}
3. Create the JavaScript File: Use script.js to validate the form and send data via Ajax.
//Contact Form in PHP
const form = document.querySelector("form"),
statusTxt = form.querySelector(".button-area span");
form.onsubmit = (e)=>{
  e.preventDefault();
  statusTxt.style.color = "#0D6EFD";
  statusTxt.style.display = "block";
  statusTxt.innerText = "Sending your message...";
  form.classList.add("disabled");

  let xhr = new XMLHttpRequest();
  xhr.open("POST", "message.php", true);
  xhr.onload = ()=>{
    if(xhr.readyState == 4 && xhr.status == 200){
      let response = xhr.response;
      if(response.indexOf("required") != -1 || response.indexOf("valid") != -1 || response.indexOf("failed") != -1){
        statusTxt.style.color = "red";
      }else{
        form.reset();
        setTimeout(()=>{
          statusTxt.style.display = "none";
        }, 3000);
      }
      statusTxt.innerText = response;
      form.classList.remove("disabled");
    }
  }
  let formData = new FormData(form);
  xhr.send(formData);
}
4. Create the PHP File: This file, named message.php, will process the form submission. Be sure to set your email as the $receiver to receive messages.
//Contact Form in PHP
<?php
  $name = htmlspecialchars($_POST['name']);
  $email = htmlspecialchars($_POST['email']);
  $phone = htmlspecialchars($_POST['phone']);
  $website = htmlspecialchars($_POST['website']);
  $message = htmlspecialchars($_POST['message']);

  if(!empty($email) && !empty($message)){
    if(filter_var($email, FILTER_VALIDATE_EMAIL)){
      $receiver = "receiver_email_address"; //enter that email address where you want to receive all messages
      $subject = "From: $name <$email>";
      $body = "Name: $name\nEmail: $email\nPhone: $phone\nWebsite: $website\n\nMessage:\n$message\n\nRegards,\n$name";
      $sender = "From: $email";
      if(mail($receiver, $subject, $body, $sender)){
         echo "Your message has been sent";
      }else{
         echo "Sorry, failed to send your message!";
      }
    }else{
      echo "Enter a valid email address!";
    }
  }else{
    echo "Email and message field is required!";
  }
?>
Read Also
- Glassmorphism Login Form in HTML and CSS
Explore the stylish world of glassmorphism as you create a modern login form using HTML and CSS. This guide breaks down the design process step by step. - Toggle Button using HTML, CSS, and JavaScript
Discover how to enhance user interaction by creating a sleek toggle button with HTML, CSS, and JavaScript. This tutorial covers everything from structure to styling. - Responsive Cards in HTML and CSS
Learn how to design eye-catching responsive cards that adapt seamlessly to any device. This guide offers practical tips for achieving stunning layouts. - Build a Google Gemini Chatbot Using HTML, CSS, and JS
Dive into chatbot development by creating a Google Gemini chatbot with HTML, CSS, and JavaScript. This tutorial will help you understand the basics of interactive forms.
Final Words
Building a functional contact form in PHP is a great way to improve user interaction on your website. The tutorial above helps you easily create and integrate a contact form that works smoothly without requiring page reloads. If you encounter issues, you can download the complete source code using the button below. Customize the form as needed to fit your website’s unique needs!